
Operating instructions


31
6 Operation
6.1 Laminator
The laminator can complete hot and cold lamination:
In the case of hot lamination, the lamination foil is adhered together.
In the case of cold lamination, the lamination foil is pressed together.
Select the lamination method according to the material to be laminated.
Note: Only cold lamination should be used for thermopaper and
ultrasonic images!
6.1.1 Hot laminating
Use the function switch, a sliding switch, to select the lamination foil
thickness you want to process and the laminator automatically activates the
temperature level associated with the corresponding thickness:
60 or 80 mic
8
100 or 125 mic
3
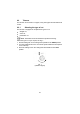
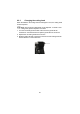
1. Set the function switch, located at the top of the device on the right-hand
side, to the lamination foil thickness being used. The laminator heats up
to the required temperature automatically. The
READY indicator flashes
orange during the warm-up phase.
2. The drive motor for the transport rollers starts up.
3. The correct operating temperature is reached after about 5 minutes and
the
READY indicator lights up green.
4. Insert the document to be laminated in the lamination foil so that there is
a margin of approx. 3 - 5 mm to the edge of the foil on all sides.
Note: Only use hot lamination foil for hot laminating.
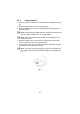
5. Guide the laminating foil containing the document to be laminated in the
laminator infeed with the closed side first. The laminating process occurs
automatically.
Note: To prevent the lamination foil from creasing, never feed the
open side of the lamination foil first in the laminator infeed. When
inserting the lamination foil, observe the instructions on the infeed slot.
8
mic or micron = abbreviation of the word mi
crometer (µm). 1 micrometer is one thousandth
of a millimetre. Examples: 60 µm = 0.06 mm. 80 µm = 0.08 mm. 100 µm = 0.1 mm. 125 µm
= 0.125 mm.