
Instructions


1
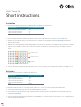
Incubation
1. Prepare the Incubation mix in a microcentrifuge tube according to the table below.
Incubation mix per ½ 96-well plate (μL)
Olink® Target 48 Incubation Solution 168
Olink® Target 48 Frw-probes 21
Olink® Target 48 Rev-probes 21
Total 210
2. Vortex and spin down the Incubation mix. Transfer 23 µL of the Incubation mix to each well of a new 8-well strip.
3. Transfer 3 μL of Incubation mix to each well of the first 6 columns of a 96-well plate by
reverse pipetting and name the
plate Incubation Plate.
4. Add 1 µL of each sample using a multi-channel pipette to the bottom of the well, 1 µl of Sample Control to the three top wells
(yellow), 1 µL of Negative Control to two wells (red), and 1 µL of Calibrators to three wells (green), according to the plate
layout.
Sample Control
Negative Control
Calibrator
5. Seal the plate with an adhesive plastic film, spin at 400 – 1000 x g, 1 min at room temperature. Incubate overnight at +4 °C.
Extension
1. Prepare an extension mix according to the table below.
Extension mix per ½ 96-well plate (µL)
High Purity Water (+4 °C) 4350
Olink® Target 48 PEA Enhancer 580
Olink® Target 48 PEA Solution 580
Olink® Target 48 PEA Enzyme 58
Total 5 568
2. Bring the Incubation Plate to room temperature, spin at 400 – 1000 x g for 1 min. Preheat the PCR machine.
3. Vortex the Extension mix and pour it into a multichannel pipette reservoir.
4. Start a timer for 5 min and transfer 96 µL of Extension mix to the upper parts of the well walls of the Incubation Plate by
using
reverse pipetting.
5. Seal the plate with a new adhesive plastic film, use the MixMate® to vortex the plate at 2500 rpm for 30 sec, ensuring that all
wells are mixed, and spin down.
®
Olink® Target 48
Short instructions