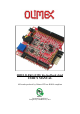
SHIELD-EKG-EMG bio-feedback shied USER’S MANUAL All boards produced by Olimex LTD are ROHS compliant Revision D, April 2013 Designed by OLIMEX Ltd, 2011
OLIMEX© 2012 SHIELD-EKG-EMG DISCLAIMER © 2013 Olimex Ltd. Olimex®, logo and combinations thereof, are registered trademarks of Olimex Ltd. Other product names may be trademarks of others and the rights belong to their respective owners. The information in this document is provided in connection with Olimex products. No license, express or implied or otherwise, to any intellectual property right is granted by this document or in connection with the sale of Olimex products.
OLIMEX© 2012 SHIELD-EKG-EMG WARNING: EKG DEVICE DISCLAIMER IEC601 is a standard that specifies tests and requirements that medical devices must pass before they can be used on humans. However, none of the devices built from these designs have been tested according to these guidelines because of the costs involved. Therefore, a device based on any of these designs may not be used for medical purposes as no medical claims are made.
OLIMEX© 2012 SHIELD-EKG-EMG Table of Contents DISCLAIMER.....................................................................................................2 SECTION 1 OVERVIEW...................................................................................5 1.1 Scope................................................................................................................................5 1.2 Features.................................................................................................
OLIMEX© 2012 SHIELD-EKG-EMG SECTION 1 OVERVIEW Thank you for choosing the SHIELD-EKG-EMG prototype board from Olimex! This document provides a User’s Guide for the Olimex SHIELD-EKG-EMG. As an overview, this chapter gives the scope of this document and lists the board’s features. The document’s organization is then detailed. 1.1 Scope The SHIELD-EKG-EMG is an extension module for Olimex's ARDUINO compatible boards – like OLIMEXINO-328, OLIMEXINO-STM32 and PIC32-PINGUINO, among others.
OLIMEX© 2012 SHIELD-EKG-EMG 1.
OLIMEX© 2012 SHIELD-EKG-EMG SECTION 2 SETTING UP THE SHIELD-EKG-EMG This section helps you set up the SHIELD-EKG-EMG development board for the first time. Please consider first the electrostatic warning to avoid damaging the board, then discover the hardware and software required to operate the board. The procedure to power up the board is given, and a description of the default board behavior is detailed. 2.
OLIMEX© 2012 SHIELD-EKG-EMG 2.3 Powering up the board The SHIELD-EKG-EMG board is powered by the host board it is mounted on. There is the option to be powered either by 3.3V or 5.0V host board (configured easily by a jumper). On powering the board PWR LED must become RED. 2.4 Arduino/Maple/Pinguino note What is Arduino? Arduino is an open-source electronics prototyping platform, designed to make the process of using electronics in multidisciplinary projects more accessible.
OLIMEX© 2012 SHIELD-EKG-EMG that part of the world. PINGUINO project founders decided to go with Python instead Java for processing language. For the moment PINGUINO is much more flexible than Arduino as it is not limited to 8bit microcontrollers.
OLIMEX© 2012 SHIELD-EKG-EMG SECTION 3 SHIELD-EKG-EMG BOARD DESCRIPTION Here you get acquainted with the main parts of the board. Note the names used on the board differ from the names used to describe them. For the actual names check the SHIELD-EKGEMG board itself. For example: BUTTON (seen on the op view below) is named BUT; RESET is named RST; etc 3.
OLIMEX© 2012 SHIELD-EKG-EMG 3.
OLIMEX© 2012 SHIELD-EKG-EMG SECTION 4 INSTALLATION EXAMPLE This is a step by step example of installing SHIELD-EKG-EMG on OLIMEXINO-328 using Windows. You can refer to the tips keeping in mind that the example utilizes a board with ATmega328 MCU. 4.1 SHIELD-EKG-EMG and OLIMEXINO-328 In this example we use OLIMEXINO-328; SHIELD-EKG-EMG; USB - USBmini cable; Arduino 1.0 IDE; two external libraries for the IDE (the latest versions of TimerOnev9 and FlexiTimer2); the latest FTDI VCP drivers (2.08.
OLIMEX© 2012 SHIELD-EKG-EMG recognized USB Serial Port (COMx) device to set x to a free port between 1 and 4 (because the monitoring software in this example can read only from COM ports 1 to 4). 9. Start Arduino IDE 1.0 and open the provided by Olimex project ShieldEkgEmgDemo.pde 10. Set Tools -> Board -> Arduino Duemilanove w/ ATmega328 Set Tools -> Serial port -> the COM we configured our board at 11. Click Upload (→) 12. Download, install and start the software from this page: https://www.olimex.
OLIMEX© 2012 SHIELD-EKG-EMG SECTION 5 HARDWARE You can get a good view of the hardware observing the board. All pins, connectors and jumpers are named individually. 5.1 Arduino shield connector These connectors follow the ARDUINO specification for shield connection. The shield comes with soldered connectors making it ready for mounting on compatible board with the possibility to have another shield mounted on it. Pin # POWER CON1 ANALOG CON2 DIGITAL CON3 DIGITAL CON4 1 RST A0 D0 D8 2 3.
OLIMEX© 2012 SHIELD-EKG-EMG REF_E If you use only one shield this jumper has to be closed. If you have multiple shields the first one should be closed; the respective REF_E jumpers on every other shield above it should be open. Default state is closed. AIN_SEL This jumper is responsible for which channel the current SHIELD-EKG-EMG would utilize. If you have more than one shield one of them should have AIN_SEL in position 1, the second in position 3, etc. Default state is in position 1.
OLIMEX© 2012 SHIELD-EKG-EMG 5.4 Custom electrode connection To make the passive electrode yourself you need three cables, passive electrode surface and audio jack. The way the signals go for connecting the audio jack is shown below: Note that connecting active electrode that way will probably lead to electrical shock for SHIELD-EKG-EMG. Only passive electrodes can be used with SHIELD-EKG-EMG.
OLIMEX© 2012 PIC-P26J50 SECTION 6 SCHEMATICS 6.1 Eagle schematics SHIELD-EKG-EMG schematic is visible for reference here. But you can find it with better resolution and stand-alone on the product’s web page: https://www.olimex.com/Products/Duino/Shields/SHIELD-EKG-EMG/. They are located in HARDWARE section. The EAGLE schematic is situated on the next page for quicker reference.
OLIMEX© 2012 SHIELD-EKG-EMG 3.3V/5V HR1x3(3.3V:Close;5V:Open) 1M/1% 1M/1% C25 PWR GYX-SD-TC0805SURK(RED) Z1 10k/1% 10nF/X7R/10% Frequency is set to be approx: (10-14)Hz Whe n 3.3 V power su pply i s used: 3.3Vp-p +/-1 0% => 165 µVp-p +/-10% BZV55C6V2 2 4 6 8 10 12 V_REF SHIELD-EKG-EMG revision B Designed by OLIMEX LTD. 2012 http://www.olimex.
OLIMEX© 2012 SHIELD-EKG-EMG 6.2 Physical dimensions As you can see below the dimensions follow the classic Arduino shield pin specification making it compatible with all Olimex Duino boards.
OLIMEX© 2012 SHIELD-EKG-EMG SECTION 7 REVISION HISTORY 7.