LONGHORN SMOKER PRODUCT GUIDE GUÍA DEL PRODUCTO 13201747-63 Serial number | Número de serie Date purchased | Fecha de compra during assembly, please call 1-800-241-7548. durante el Ensamblado, llámenos Al 1-800-241-7548.
TABLE OF CONTENTS THIS GRILL IS FOR OUTDOOR USE ONLY. Product Record Information . . . . . . . . . . . . . . . . . . . . . . . . . . . . 1 Safety Symbols . . . . . . . . . . . . . . . . . . . . . . . . . . . . . . . . . . . . 2-3 WARNING Preparing to use your Smoker . . . . . . . . . . . . . . . . . . . . . . . . . . 3 Smoker Maintenance . . . . . . . . . . . . . . . . . . . . . . . . . . . . . . . . .
PREPARING TO USE YOUR SMOKER WARNING Most surfaces on this unit are hot when in use. Use extreme caution. Keep others away from unit Always wear protective clothing to prevent injury. Keep children and pets away. Do not move this unit during operation. Never substitute gasoline, kerosene or alcohol for charcoal starter. In some states, the use of charcoal starter is prohibited by law. In this case, paraffin-based starter cubes can be substituted for charcoal starter.
Food Safety SMOKING AND SLOW COOKING Remove the cooking grill from the firebox and build your fire on top of the fire grate in the firebox. Either charcoal or wood may be used, but wood is the recommended fuel for it’s rate of burn and the flavor it imparts to the food being cooked. Most seasoned hardwoods are good for smoking such as hickory, mesquite, pecan, oak, and many other fruit woods. Bark should be avoided or burned off first as it contains a high acid content and imparts an acrid flavor.
LIMITED WARRANTY This warranty only applies to units purchased from an authorized retailer. Manufacturer warrants to the original consumer-purchaser only that this product shall be free from defects in workmanship and materials after correct assembly and under normal and reasonable home use for the periods indicated below beginning on the date of purchase*.
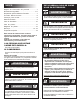
ÍNDICE ESTA PARRILLA SOLO SE PUEDE USAR EN EXTERIORES. Registro de información del producto...................1 Símbolos de seguridad..........................................6-7 Preparación para la utilización Fumador....................7 Fumador Mantenimiento ..............................8 Consejos para cocinar..........................................8 Garantía limitada ....................................................9 Lista de Hardware.................................................
PREPARATIVOS PARA USAR SU AHUMADOR ADVERTENCIA Antes de cocinar con su ahumador, debe seguir al pie de la letra os siguientes pasos para curar el acabado y el acero del interior. Si no cumple con estos requisitos al pie de la letra, se puede dañar el interior de la ahumador y los primeros alimentos que cocine podrán tener un gusto metálico. 1. Unte todas las superficies metálicas del interior, incluyendo las ahumadors y las rejillas con aceite vegetal para cocinar. 2.
Nuestras sugerencias: Pollo - Aliso, manzano, nogal americano, mezquite Carne de res - Nogal americano, mezquite, roble Cerdo - Madera de árboles frutales, nogal americano, roble Carnero - Madera de árboles frutales, mezquite Ternera - Madera de árboles frutales Pescado y mariscos - Aliso, mezquite Verduras - Mezquite CÓMO SABER CUÁNDO ESTÁ LISTO EL FUEGO La buena calidad del asado al carbón depende de la calidad del fuego en la ahumador.
GARANTÍA LIMITADA Esta garantía es válida únicamente para las unidades adquiridas de los distribuidores autorizados. El fabricante le garantiza únicamente al consumidorcomprador original, que este producto no presentará defectos de mano de obra ni de materiales por el período indicado a continuación, contado desde la fecha de compra*, si se arma correctamente y se usa en el hogar, en condiciones normales y razonables.
HARDWARE HERRAJES Hitch Pin Qty: 2 Pin de enganche Cant: 2 1/4-20 Flange Nut Qty. 16 1/4-20 brida de la tuerca Cant. 16 12mm Flat Washer Qty: 4 12mm arandela plana Cant: 4 3/8-16x1” Hex-Head Bolt Qty. 17 3/8-16x1” Perno hexagonal Cant. 17 3/8-16 Hex Nut Qty. 8 3/8-16 tuerca hexagonal Cant. 8 3/8" Lock Washer Qty. 8 3/8" arandela de seguridad Cant. 8 1/4-20x1/2” Hex-Head Bolt Qty. 4 1/4-20x1/2” Perno hexagonal Cant.
PARTS LIST C 1 FIREBOX BOTTOM W K 1 COOKING GRATE, 23”X19” L 1 COOKING GRATE, 17.1”X19” M 1 1 COOKING GRATE, 14.2”X18.2” SPRING, F/DAMPER ASSEMBLY MANUAL, ENGLISH, SPANISH LISTA DE HERRAJES Parrilla de cocción, 14.2”x18.2” W 1 Resorte, F / Amortiguador Parrilla de cocción, 23”x19” Parrilla de cocción, 17.
V W E L U K D T J F J G O A Q B C N R H S I J M P 12 F
ASSEMBLY ARMADO 1 FIRST, GET A HELPER! This unit is heavy and requires a second person for lifting and moving. NEXT, pick a suitable location to work. Open the carton and slit the corners so that the carton lays flat. This will give you a protective surface during assembly. Remove the carton packing material and the parts from inside the firebox and smoke chamber. Primero, consiga un ayudante! Esta unidad es pesada y requiere de una segunda persona para levantar y mover.
3 With one person on smoke chamber end, roll the unit onto cardboard that was placed on the ground next to the unit. Unit should now be resting on its smoke chamber handle brackets with the leg posts pointing upward. Ÿ Slide short legs onto posts at right side, with wheels facing outward. Etapa larga Ÿ Slide long legs onto posts at opposite end. Long Leg Ÿ Secure each leg to a leg post by screwing one 3/816x1” hex-head bolt through the leg until it reaches the leg post.
5 6 Make sure that leg bolts are tight enough so that legs won't slip off of posts. With the assistance of a helper, roll the unit over the handle brackets and stand it up onto its legs. Once standing, fully tighten the four leg bolts against leg post walls Asegúrese de que los pernos de las piernas son lo suficientemente apretado para que las piernas no se le salga de los puestos. Con la asistencia de un ayudante, gire la unidad sobre los soportes de manejar y de pie sobre sus patas arriba.
7 Connect firebox lid and firebox bottom using four 1/4Conecte la tapa cámara de combustión y el fondo con cuatro 20×½" hex head bolts and four 1/4-20 flange nuts. Tighten fogones 1/4-20 x ½ “perno hexagonal y cuatro 1/4-20 tuerca de la securely. bridas. Apriete de forma segura.
9 Attach handle to smoke chamber lid and firebox lid using eight 1/4-20×½" screws and 1/4-20 flange nuts. Tighten securely. Adjuntar manejar al humo tapa de la cámara y la tapa del fogón con ocho 1/4-20 x ½ "tornillos y tuercas de 1/4-20. Ajuste con firmeza. 1/4-20x1/2" Screws 1/4-20x1/2" tornillos Smoke Chamber handle shown installed. Cámara de humo manejar muestra instalada.
11 Attach front shelf to smoke chamber by sliding ends of shelf frame into bushing on front of smoke chamber. Next, install the Temperature Gauge into the bushing located on the Smoker Chamber Lid. Align gauge and then secure with jamb nut. Temperature Gauge Medidor de temperatura Adjuntar plataforma frente al humo de la cámara deslizando extremos del marco útil en el casquillo en la parte frontal de la cámara de humo.
FOR US ONLY Text “Register” to “GRILLS” (474557) Envíe un mensaje de texto con la palabra “Register” a “GRILLS” (474557) 19 19
©2016 Char-Broil, LLC. Columbus, GA, 31902. Printed in China. Impreso en China. ©2016 Assembly instructions. ©2016 Instrucciones de ensamblado.