
Operation Manual


14
EN
INTENDED USE
This appliance is used exclusively for preparing food.
COMPONENTS
Fold out front and rear page for product illustrations.
A. Air inlet (not illustrated)
B. Air outlets (not illustrated)
C. Cooking plate
D. Cooking zone
E. Display with mode indicators
F. Control panel
G. Non-slip feet
(bottom of appliance, not illustrated)
H. Power cord with plug
I. Timer button
J. Increase + button
K. Reduce – button
L. Function button (Power / Temperature)
M. On/O standby button
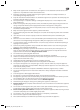
BEFORE FIRST TIME USE
• Clean the appliance ( Cleaning and care).
• Due to the manufacturing process, the appliance may emit a slight burning odour when switched on
for the rst time. This is normal and does not indicate any defect or hazard.
OPERATION
1
Leave at least 20 cm of distance to heat-sensitive areas and appliances around the appliance.
DO NOT operate the product on plastic table cloth or paper.
2
Connect with plug with a suitable wall outlet. An audio signal sounds. The display lights up.
3
Place suitable cookware on the cooking eld.
Suitable: Flat pots or pans made from (stainless) steel, die-cast or enamelled iron (diameter Ø 10 to
22 cm).
Recommended types and sizes of cookware
Material Cookware with a bottom made of iron or magnetic stainless steel.
Shape Cookware with a at bottom.
Size Cookware with a bottom diameter of 10 to 22 cm.
4
Not suitable: Unstable or easy-to-tilt cookware. Pots or pans made from ceramic, glass, aluminium
or magnetised stainless steel (diameter Ø smaller than 10 cm or larger than 22 cm).
Unsuitable cookware
Material Cookware made of ceramic, glass, aluminium, copper.
Shape Cookware with a non-at bottom (i.e. rounded).
Size Cookware with a bottom diameter of < 10 or > 22 cm.
5 Press the On/O button. Display: .
Use the Function button to select a cooking mode ( following chapters).
Note: If no button is pressed within 1 minute, the appliance will change to standby mode.
Cooking power
6
Press the Function button repeatedly until the light indicator Watt lights up. Use the Increase +/
Reduce – buttons to set your desired cooking power:
Display Power
P1 400 W
P2 600 W
P3 800 W
P4 1000 W
Display Power
P5 1200 W
P6 1400 W
P7 1600 W
P8 * 1800 W
*: Default setting
OSP502_A5_131213 (1.2).indb 14 16/12/13 6:04 PM