
Installation Guide


28
29
Sealant
1
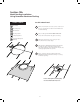
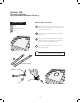
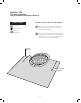
TOOLS & PARTS
Once the Formable Aluminum Flashing is shaped to
match the downhill tiles, clean and dry the surfaces of
aluminum, felt paper, and tile. Apply roofing sealant
to all adjoining surfaces.
1
Gloves
Formable Aluminum Flashing
(9) 2” Metal Flashing Screws
Washers
Phillips Screwdriver
Roofing Sealant
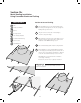
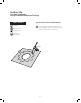
Secure the Formable Aluminum Flashing with the
Metal Flashing Screws and Washers.
The 9 screws provided should be installed in a circular,
equally spaced pattern around the aluminum collar
to improve water sealing. Dab roof sealant on each
screw to create a water-tight seal.
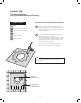
The 10” unit has a 21” diameter screw pattern;
the 14” unit has a 24” diameter screw pattern
2
2
3
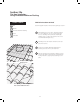
Screws In
Circular Pattern
Screws Anchored
Into Optional Shim
Secure The Formable Aluminum Flashing
Section-13g
Tile Roof Intallation
Using Formable Aluminum Flashing
The optional wooden shim can be used as a screw
anchor as well.
TIP