Caution symbol indicates potential hazard to you, the device and/or the computer. ONE YEAR LIMITED WORLDWIDE WARRANTY OCZ Technology provides a limited one year worldwide warranty on this product. Contact OCZ Technology immediately upon discovery of any defects covered by this warranty. Before sending the product in for repairs, contact OCZ Technology. The product will be repaired or replaced with the same or similar model.
TABLE OF CONTENTS 1.0 Introduction ……………………………………………………………………. 4 2.0 System Requirements………………………………………………………… 4 3.0 Installation Guide……………………… ……………………………………. 4 4.0 Display Key Setup and Management…..………………………………….. 13 5.0 OLED Display Key Execution and Exiting………………………………….. 17 6.0 Uninstall ………………………………………………………………………... 17 7.
1.0 Introduction The OCZ Sabre Keyboard device allows the use of symbols on keys that can be changed by software to match interaction in various applications and states. The OCZ Sabre can handle various such devices in a dynamic and abstract manner, such that applications can use the full functionality of the device without caring about hardware details, and also loads and provides layers for applications that do not interface with the OCZ Sabre.
3.2 Plug the OCZ Sabre Keyboard into an open USB port. The Found New Hardware Wizard window may open: 3.2.1 If so, click “Cancel”.
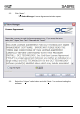
Additionally, the following window may open. 3.2.2 If so, click “Open folder to view files”. The Windows File Explorer opens showing a new USB Mass Storage Drive embedded within the device. NOTE: If no window opens, open file explorer, locate the new Removable Disk. 3.2.3 Delete any files found on the device. 3.3 Download the latest drivers at www.ocztechnology.com/drivers/. 3.4 Run setup.exe.
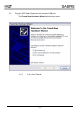
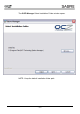
The Sabre Manager Setup Wizard opens: -7-
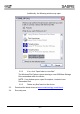
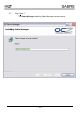
3.5 Click “Next>”. The Sabre Manager License Agreement window opens: 3.6 Select the “I Agree” radio button and click “Next >” to continue loading the software.
The OLED Manager Select Installation Folder window opens. NOTE: Keep the default installation folder path.
3.7 Click “Next >”.
The OLED Manager Installation Complete window opens: 3.8 Click “Close”. The OCZ Technology SabreManager icon is placed on the Desktop: The drivers and software are now installed and ready for customization. 3.9 Double click the Sabre Manager icon.
The OCZ Technology Display Key Manager (Sabre Manager) and a simulated Display Key window opens: OLED Manager Simulated Display Keys - 12 -
4.0 4.1 Display Key Setup and Management Introduction The Display Key Manager (DKM) is comprised of a menu bar, three tabs (Configs, Layers and Tasks) and a run button. The Config tab is for future expansion. Layers define an array of nine display keys to defined tasks. Tasks associate images and define actions. The run executes the configuration and minimizes the DKM to the system tray. The installed default configuration is provided as a functioning example of the device. 4.2 Menu Bar 4.2.
and browsing for the image. Image formats must be either bmp or jpg. • Click in the Name column and input the task name. • Click twice in the Action column to reveal a drop down menu and select an action.
• 4.3.2 The “Next Task” column is used to dynamically change the display key assignment to another task after execution. Task deletion: Right click on the task image or name then click “Delete”. A window will appear to confirm the action. Layers 4.3.3 Layer Types and creation: There are four layer types: Global Layer: The Global layer is called when no other layers exist and is intended to be used as a main menu layer. This layer cannot be renamed or deleted.
• Open the application and dialog window • Right click in the Process column, click “Pick” then click on the application dialog window. NOTE: The “Process” and “Captions” text boxes will automatically populate with the application executable file name and dialog window title. Manual Layer: A Manual layer is only referenced by another layer. A manual layer is called by a display key task. This type of layer is used to provide access to multiple layers within an application. Manual layer creation: 4.3.
4.4.3 Moving a task to another Display Key on a given layer: Drag and drop the task from one Display Key to the desired Display Key. 5.0 5.1 5.2 6.0 OLED Display Key Execution and Exiting Execution: • After the tasks and layers are defined, execute the DKM by clicking the Run button. • The DKM will execute (enter run mode) and minimize to the System tray. • If in edit mode (i.e.