
Operation Manual


Table Of Contents
- Contents
- 1 Introduction
- 2 Installing the HDD Backup Utility
- 3 Starting up the HDD Backup Utility
- 4 Registering the multifunctional product to be backed up
- 5 Backing up
- 6 Restoring
- 7 Settings
- 8 Linking to Data Administrator
- 9 Error message list
Settings
7
HDD Backup Utility 7-10
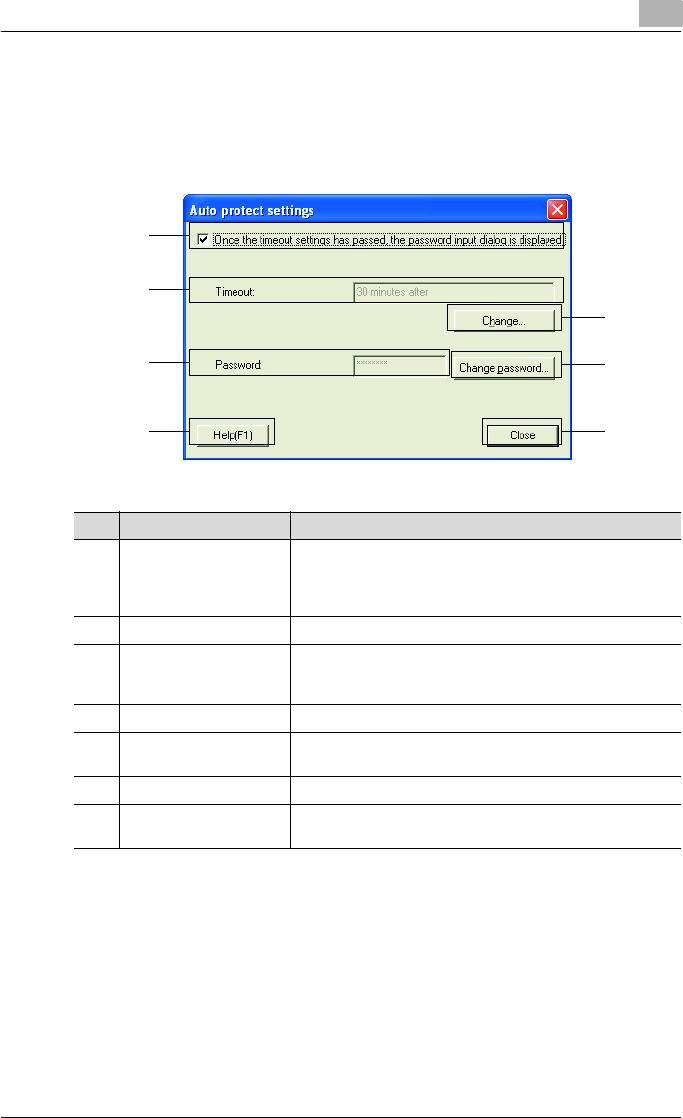
7.2 Auto protect settings dialog box
From the Auto protect settings dialog box, auto protect settings can be
specified. When auto protect settings are applied, a password can be spec-
ified to limit access to HDD Backup Utility.
7
1
2
4
6
5
3
No. Item Name Description
1 Once the timeout set-
tings has passed, the
password input dialog is
displayed.
When the check box is selected, auto protect settings are ap-
plied and a dialog box appears, allowing the password and
timeout settings to be specified. For details, refer to “Appli-
cation protect settings dialog box” on page 7-11.
2 Timeout Displays the specified length of time until a timeout occurs.
3 [Change] button Allows the setting for the length of time until a timeout occurs
to be changed. If the auto protect settings are canceled, the
setting cannot be changed.
4 Password Normally, “********” appears.
5[Change password] but-
ton
Allows the password to be changed. If the auto protect set-
tings are canceled, the password cannot be changed.
6 [Help] button Displays the online Help.
7 [Close] button Closes the Auto protect settings dialog box, and displays the
main window again.