
Operation Manual


Table Of Contents
- Contents
- 1 Introduction
- 2 Installing the HDD Backup Utility
- 3 Starting up the HDD Backup Utility
- 4 Registering the multifunctional product to be backed up
- 5 Backing up
- 6 Restoring
- 7 Settings
- 8 Linking to Data Administrator
- 9 Error message list
Starting up the HDD Backup Utility
3
HDD Backup Utility 3-2
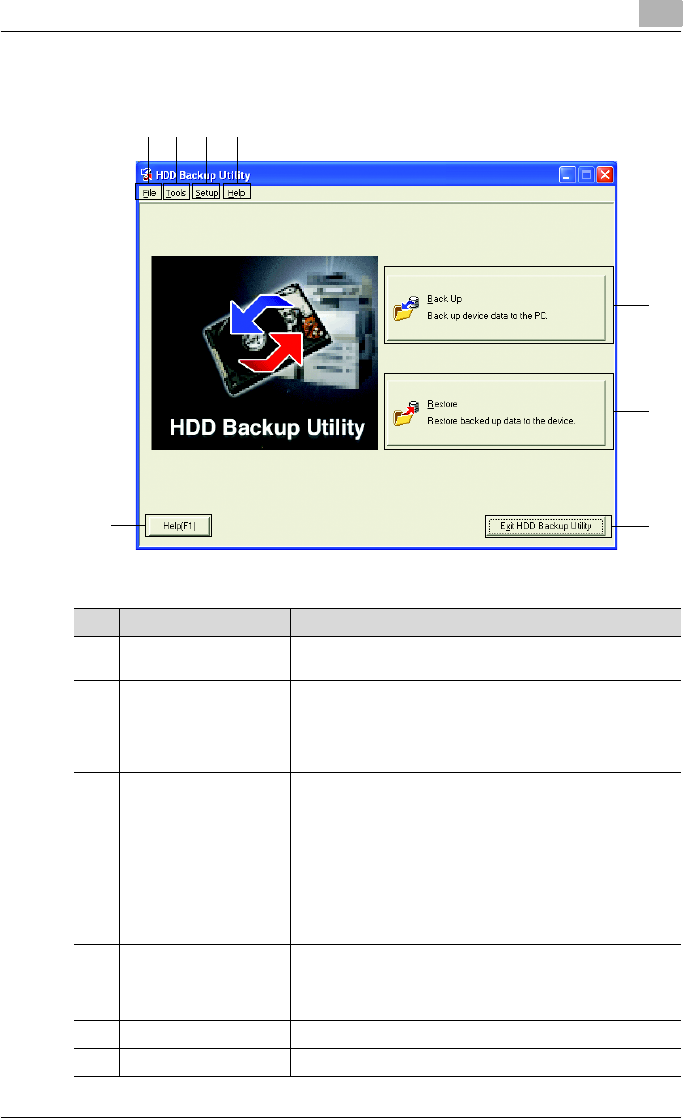
3.1 Main window
23
7
5
8
1
6
4
No. Item Name Description
1 [File] menu Exits the application.
[Exit HDD Backup Utility]: Exits the HDD Backup Utility.
2 [Tools] menu Starts up the various wizards.
• [Back Up]: Starts up the Backup wizard. % “Backing up”
on page 5-1
• [Restore]: Starts up the Restore wizard. % “Restoring” on
page 6-1
3 [Setup] menu Displays the Setup dialog box. For details, refer to “Settings”
on page 7-1.
• [Device Registration]: Allows new multifunctional products
to be registered, or their information to be edited.
% “Device registration dialog box” on page 7-2
• [Auto Protect]: Allows auto protect settings to be speci-
fied. % “Auto protect settings dialog box” on page 7-10
• [Options]: Allows settings to be specified for changing the
location of the report file and for verifying the data.
% “Options dialog box” on page 7-12
4 [Help] menu Displays various information for this software.
[HDD Backup Utility Help]: Displays the online Help.
[About HDD Backup Utility]: Displays the version information
for this software.
5 [Back Up] button: Starts up the Backup wizard.
6 [Restore] button: Starts up the Restore wizard.