
2020.2


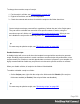
Table Of Contents
- Table of Contents
- Welcome to PrintShop Mail Connect 2020.2
- Setup And Configuration
- System and Hardware Considerations
- Installation and Activation
- Preferences
- Clean-up Service preferences
- Database Connection preferences
- Editing preferences
- Email preferences
- Emmet preferences
- Engines preferences
- Hardware for Digital Signing preferences
- Language preferences
- Logging preferences
- Parallel Processing preferences
- Print preferences
- Project Wizards preferences
- Save preferences
- Scripting preferences
- Engines preferences
- Parallel Processing preferences
- Known Issues
- Uninstalling
- General information
- The Designer
- Designer basics
- Content elements
- Snippets
- Styling and formatting
- Personalizing content
- Preferences
- Clean-up Service preferences
- Database Connection preferences
- Editing preferences
- Email preferences
- Emmet preferences
- Engines preferences
- Hardware for Digital Signing preferences
- Language preferences
- Logging preferences
- Parallel Processing preferences
- Print preferences
- Project Wizards preferences
- Save preferences
- Scripting preferences
- Writing your own scripts
- Script types
- Creating a new Standard Script
- Writing a script
- Setting the scope of a script
- Managing scripts
- Testing scripts
- Optimizing scripts
- The script flow: when scripts run
- Selectors in Connect
- Loading a snippet via a script
- Loading content using a server's API
- Using scripts in Dynamic Tables
- Control Scripts
- Post Pagination Scripts
- Translating templates
- Designer User Interface
- Designer Script API
- Generating output
- Print Manager
- PrintShop Mail Connect Release Notes
- OL PrintShop Mail ConnectRelease Notes 2020.2.1
- Previous Releases
- OL PrintShop Mail Connect Release Notes 2020.1
- License Update Required for Upgrade to Connect 2019.x
- Backup before Upgrading
- Overview
- OL Connect 2019.2 Enhancements
- Connect 2019.2 Designer Improvements
- Connect 2019.2 Output Improvements
- Print Manager Improvements
- Known Issues
- License Update Required for Upgrade to Connect 2019.1
- Overview
- OL Connect 2019.1 Enhancements
- Connect 2019.1 Designer Updates
- Connect 2019.1 Output updates
- Print Wizard and Preset Wizard Improvements
- Known Issues
- Overview
- Connect 2018.2.1 Enhancements/Fixes
- Connect 2018.2 Enhancements
- Connect 2018.2 Designer Updates
- Connect 2018.2 Output updates
- Print Wizard and Preset Wizard Improvements
- Connect 2018.2 Print Manager updates
- Known Issues
- Overview
- Connect 2018.1.6 Enhancements/Fixes
- Connect 2018.1.5 Enhancements/Fixes
- Connect 2018.1.4 Enhancements/Fixes
- Connect 2018.1.3 Enhancements/Fixes
- Connect 2018.1.2 Enhancements/Fixes
- Connect 2018.1.1 Enhancements/Fixes
- Connect 2018.1 General Enhancements
- Connect 2018.1 Designer Enhancements/Fixes
- Connect 2018.1 Output Enhancements/Fixes
- Connect 2018.1 Print Manager Enhancements/Fixes
- Known Issues
- Overview
- Connect 1.8 General Enhancements and Fixes
- Connect 1.8 Performance Related Enhancements and Fixes
- Connect 1.8 Designer Enhancements and Fixes
- Connect 1.8 Output Enhancements and Fixes
- Connect 1.8 Print Manager Enhancements and Fixes
- Known Issues
- Overview
- Connect 1.7.1 General Enhancements and Fixes
- Connect 1.7.1 Designer Enhancements and Fixes
- Connect 1.7.1 Output Enhancements and Fixes
- Known Issues
- Overview
- Connect 1.6.1 General Enhancements and Fixes
- Connect 1.6.1 Designer Enhancements and Fixes
- Connect 1.6.1 Output Enhancements and Fixes
- Known Issues
- Overview
- Connect 1.5 Designer Enhancements and Fixes
- Connect 1.5 Output Enhancements and Fixes
- Connect 1.5 General Enhancements and Fixes
- Known Issues
- Overview
- Connect 1.4.2 Enhancements and Fixes
- Connect 1.4.1 New Features and Enhancements
- Connect 1.4.1 Designer Enhancements and Fixes
- Connect 1.4.1 Output Enhancements and Fixes
- Known Issues
- Knowledge Base
- Legal Notices and Acknowledgements

3. Click the label to the left of the ID or Class input field (ID or Class) to make a new script
with that ID or class as selector.
Writing a script
1. Create a new script (see: "Creating a new Standard Script" on page383, " Adding a
Control Script" on page418 or "Adding a Post Pagination Script" on page434), or
double-click an existing script in the Scripts pane on the bottom left.
If the script was made with a Script Wizard, you have to click the Expand button before
you can start writing code. This will change the Script Wizard into an editor window.
Warning
When you change an expanded text script and save it, it becomes impossible to
edit the script using the Script Wizard again.
2.
Write the script. Click Apply from time to time to see if the script works as expected. This
will be visible on the Preview tab in the main workspace.
Syntax rules
Every script in the Designer must follow JavaScript syntax rules. For example, each statement
should end with ; and the keywords that can be used, such as var to declare a variable, are
JavaScript keywords. There are countless tutorials available on the Internet to familiarize
yourself with the JavaScript syntax.
For a simple script all that you need to know can be found on the following web pages:
https://www.w3schools.com/js/js_syntax.asp and https://www.w3schools.com/js/js_if_else.asp.
A few examples can be found in a How-to: Combining record based conditions.
Tip
In the editor window, press Ctrl + Space to see the available features and their
descriptions.
Use the arrow keys to select a function or object and press Enter to insert it in the script.
Type a dot after the name of the function or object and press Ctrl + space again to see
which features are subsequently available.
For more keyboard shortcuts, see "Keyboard shortcuts" on page535.
Page 385