
2020.2
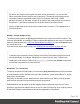
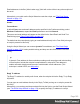

Table Of Contents
- Table of Contents
- Welcome to PrintShop Mail Connect 2020.2
- Setup And Configuration
- System and Hardware Considerations
- Installation and Activation
- Preferences
- Clean-up Service preferences
- Database Connection preferences
- Editing preferences
- Email preferences
- Emmet preferences
- Engines preferences
- Hardware for Digital Signing preferences
- Language preferences
- Logging preferences
- Parallel Processing preferences
- Print preferences
- Project Wizards preferences
- Save preferences
- Scripting preferences
- Engines preferences
- Parallel Processing preferences
- Known Issues
- Uninstalling
- General information
- The Designer
- Designer basics
- Content elements
- Snippets
- Styling and formatting
- Personalizing content
- Preferences
- Clean-up Service preferences
- Database Connection preferences
- Editing preferences
- Email preferences
- Emmet preferences
- Engines preferences
- Hardware for Digital Signing preferences
- Language preferences
- Logging preferences
- Parallel Processing preferences
- Print preferences
- Project Wizards preferences
- Save preferences
- Scripting preferences
- Writing your own scripts
- Script types
- Creating a new Standard Script
- Writing a script
- Setting the scope of a script
- Managing scripts
- Testing scripts
- Optimizing scripts
- The script flow: when scripts run
- Selectors in Connect
- Loading a snippet via a script
- Loading content using a server's API
- Using scripts in Dynamic Tables
- Control Scripts
- Post Pagination Scripts
- Translating templates
- Designer User Interface
- Designer Script API
- Generating output
- Print Manager
- PrintShop Mail Connect Release Notes
- OL PrintShop Mail ConnectRelease Notes 2020.2.1
- Previous Releases
- OL PrintShop Mail Connect Release Notes 2020.1
- License Update Required for Upgrade to Connect 2019.x
- Backup before Upgrading
- Overview
- OL Connect 2019.2 Enhancements
- Connect 2019.2 Designer Improvements
- Connect 2019.2 Output Improvements
- Print Manager Improvements
- Known Issues
- License Update Required for Upgrade to Connect 2019.1
- Overview
- OL Connect 2019.1 Enhancements
- Connect 2019.1 Designer Updates
- Connect 2019.1 Output updates
- Print Wizard and Preset Wizard Improvements
- Known Issues
- Overview
- Connect 2018.2.1 Enhancements/Fixes
- Connect 2018.2 Enhancements
- Connect 2018.2 Designer Updates
- Connect 2018.2 Output updates
- Print Wizard and Preset Wizard Improvements
- Connect 2018.2 Print Manager updates
- Known Issues
- Overview
- Connect 2018.1.6 Enhancements/Fixes
- Connect 2018.1.5 Enhancements/Fixes
- Connect 2018.1.4 Enhancements/Fixes
- Connect 2018.1.3 Enhancements/Fixes
- Connect 2018.1.2 Enhancements/Fixes
- Connect 2018.1.1 Enhancements/Fixes
- Connect 2018.1 General Enhancements
- Connect 2018.1 Designer Enhancements/Fixes
- Connect 2018.1 Output Enhancements/Fixes
- Connect 2018.1 Print Manager Enhancements/Fixes
- Known Issues
- Overview
- Connect 1.8 General Enhancements and Fixes
- Connect 1.8 Performance Related Enhancements and Fixes
- Connect 1.8 Designer Enhancements and Fixes
- Connect 1.8 Output Enhancements and Fixes
- Connect 1.8 Print Manager Enhancements and Fixes
- Known Issues
- Overview
- Connect 1.7.1 General Enhancements and Fixes
- Connect 1.7.1 Designer Enhancements and Fixes
- Connect 1.7.1 Output Enhancements and Fixes
- Known Issues
- Overview
- Connect 1.6.1 General Enhancements and Fixes
- Connect 1.6.1 Designer Enhancements and Fixes
- Connect 1.6.1 Output Enhancements and Fixes
- Known Issues
- Overview
- Connect 1.5 Designer Enhancements and Fixes
- Connect 1.5 Output Enhancements and Fixes
- Connect 1.5 General Enhancements and Fixes
- Known Issues
- Overview
- Connect 1.4.2 Enhancements and Fixes
- Connect 1.4.1 New Features and Enhancements
- Connect 1.4.1 Designer Enhancements and Fixes
- Connect 1.4.1 Output Enhancements and Fixes
- Known Issues
- Knowledge Base
- Legal Notices and Acknowledgements

Dynamic attachment scripts add a <link> element to the <head> of an Email section. The title
attribute of that element specifies the attachment name that will show up in the email.
Take a look at the last line of the script:
results.append(query("<link rel=related>").attr("title", result.split('/').pop()).attr("href", result));
To give the attachment another name, you have to replace the bold part of the code by that new
name. For example:
results.append(query("<link rel=related>").attr("title", "Invoice.pdf").attr("href", result));
Of course, you can also use data field values here, for example: results.append(query("<link
rel=related>").attr("title", record.fields.invoice_number + ".pdf").attr("href", result));
Note that the Wizard can no longer be used once you have edited and saved the script.
Note
For attachment names, it is recommended to use only US-ASCII characters. Other
characters may not be supported by all email servers and clients.
Content elements
Once you have created a template, it can be filled with all kinds of elements. All types of
elements are listed on this page.
There are several ways to insert elements, see "Inserting an element" on page193.
Each element can have an IDand a class, as well as a number of other properties, depending
on the element's type. When an element is selected, its properties can be changed; see
"Selecting an element" on page194, "Attributes" on page191 and "Styling and formatting an
element" on page195.
ID's and classes are particularly useful with regard to variable data (see "Personalizing
content" on page329) and styling (see "Styling templates with CSS files" on page287).
When you add elements, such as text, images or a table, to the content of a template, you are
actually constructing an HTML file. It is possible to edit the source of the HTML file directly in
the Designer; see "Editing HTML" on page191.
Element types
The following types of content can be added to the content of a template:
Page 189