
2020.1


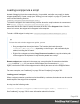


Table Of Contents
- Table of Contents
- Welcome to PrintShop Mail Connect 2020.1
- Setup And Configuration
- System and Hardware Considerations
- Installation and Activation
- Preferences
- Clean-up Service preferences
- Database Connection preferences
- Editing preferences
- Email preferences
- Emmet preferences
- Engines preferences
- Hardware for Digital Signing preferences
- Language preferences
- Logging preferences
- Parallel Processing preferences
- Print preferences
- Project Wizards preferences
- Save preferences
- Scripting preferences
- Engines preferences
- Parallel Processing preferences
- Known Issues
- Uninstalling
- General information
- The Designer
- Designer basics
- Content elements
- Snippets
- Styling and formatting
- Personalizing content
- Preferences
- Clean-up Service preferences
- Database Connection preferences
- Editing preferences
- Email preferences
- Emmet preferences
- Engines preferences
- Hardware for Digital Signing preferences
- Language preferences
- Logging preferences
- Parallel Processing preferences
- Print preferences
- Project Wizards preferences
- Save preferences
- Scripting preferences
- Writing your own scripts
- Script types
- Creating a new Standard Script
- Writing a script
- Setting the scope of a script
- Managing scripts
- Testing scripts
- Optimizing scripts
- The script flow: when scripts run
- Selectors in Connect
- Loading a snippet via a script
- Loading content using a server's API
- Using scripts in Dynamic Tables
- Control Scripts
- Post Pagination Scripts
- Translating templates
- Designer User Interface
- Designer Script API
- Generating output
- Print Manager
- PrintShop Mail Connect Release Notes
- OL PrintShop Mail Connect Release Notes 2020.1
- Previous Releases
- License Update Required for Upgrade to Connect 2019.x
- Backup before Upgrading
- Overview
- OL Connect 2019.2 Enhancements
- Connect 2019.2 Designer Improvements
- Connect 2019.2 Output Improvements
- Print Manager Improvements
- Known Issues
- License Update Required for Upgrade to Connect 2019.1
- Overview
- OL Connect 2019.1 Enhancements
- Connect 2019.1 Designer Updates
- Connect 2019.1 Output updates
- Print Wizard and Preset Wizard Improvements
- Known Issues
- Overview
- Connect 2018.2.1 Enhancements/Fixes
- Connect 2018.2 Enhancements
- Connect 2018.2 Designer Updates
- Connect 2018.2 Output updates
- Print Wizard and Preset Wizard Improvements
- Connect 2018.2 Print Manager updates
- Known Issues
- Overview
- Connect 2018.1.6 Enhancements/Fixes
- Connect 2018.1.5 Enhancements/Fixes
- Connect 2018.1.4 Enhancements/Fixes
- Connect 2018.1.3 Enhancements/Fixes
- Connect 2018.1.2 Enhancements/Fixes
- Connect 2018.1.1 Enhancements/Fixes
- Connect 2018.1 General Enhancements
- Connect 2018.1 Designer Enhancements/Fixes
- Connect 2018.1 Output Enhancements/Fixes
- Connect 2018.1 Print Manager Enhancements/Fixes
- Known Issues
- Overview
- Connect 1.8 General Enhancements and Fixes
- Connect 1.8 Performance Related Enhancements and Fixes
- Connect 1.8 Designer Enhancements and Fixes
- Connect 1.8 Output Enhancements and Fixes
- Connect 1.8 Print Manager Enhancements and Fixes
- Known Issues
- Overview
- Connect 1.7.1 General Enhancements and Fixes
- Connect 1.7.1 Designer Enhancements and Fixes
- Connect 1.7.1 Output Enhancements and Fixes
- Known Issues
- Overview
- Connect 1.6.1 General Enhancements and Fixes
- Connect 1.6.1 Designer Enhancements and Fixes
- Connect 1.6.1 Output Enhancements and Fixes
- Known Issues
- Overview
- Connect 1.5 Designer Enhancements and Fixes
- Connect 1.5 Output Enhancements and Fixes
- Connect 1.5 General Enhancements and Fixes
- Known Issues
- Overview
- Connect 1.4.2 Enhancements and Fixes
- Connect 1.4.1 New Features and Enhancements
- Connect 1.4.1 Designer Enhancements and Fixes
- Connect 1.4.1 Output Enhancements and Fixes
- Known Issues
- Knowledge Base
- Legal Notices and Acknowledgements

()" on page785) to retrieve the content. The link that you selected in Step 1 should be passed
to the function as a string. For example:
loadjson('https://blog.mozilla.org/wp-json/wp/v2/posts?per_
page=5');
If the returned content is JSON data, that data has to be wrapped in HTML before inserting it
into the template. This is demonstrated in the example below.
Tip
Install the Postman application to preview JSON returned by an endpoint.
Tip
To load a JavaScript file (.js) or a style sheet (.css) you can use loadtext(). See "loadtext()" on
page787.
Inserting content in the template
To insert the content after the selected element, use results.after(). To replace the element
with the new content, use results.html() or results.replaceWith().
Example: recent posts
The following script loads five posts from Mozilla's blog and inserts their titles as links in a
template. Mozilla's blog is a WordPress website. Since the WordPress REST API uses JSON
as the response format, the loadjson() function has to be used and the received content has to
be wrapped in HTML.
If the script's selector was h1 (a level one heading), the retrieved content would be inserted after
each level one heading.
var postsObj = loadjson('https://blog.mozilla.org/wp-
json/wp/v2/posts?per_page=5');
var html = '';
html = '<ul>';
for (var idx in postsObj) {
html += '<li><a href="' + postsObj[idx].link + '">' + postsObj
[idx].title.rendered + '</a></li>';
}
Page 408