
1.8


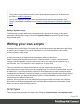
Table Of Contents
- Table of Contents
- Welcome to PrintShop Mail Connect 1.8
- Setup And Configuration
- System and Hardware Considerations
- Installation and Activation
- Where to obtain the installers
- Installation - important information
- Installation - How to guides
- Activation
- Installation Prerequisites
- User accounts and security
- The Importance of User Credentials on Installing and Running PrintShop Mail C...
- Installing PrintShop Mail Connect on Machines without Internet Access
- Installation Wizard
- Running connect installer in Silent Mode
- Activating a License
- Migrating to a new workstation
- Known Issues
- Uninstalling
- Connect: a peek under the hood
- Connect File Types
- The Designer
- Designer basics
- Content elements
- Snippets
- Styling and formatting
- Personalizing Content
- Writing your own scripts
- Designer User Interface
- Designer Script API
- Designer Script API
- Examples
- Examples
- Examples
- Examples
- Examples
- Examples
- Examples
- Examples
- Examples
- Examples
- Examples
- Examples
- Examples
- Example
- Example
- Example
- Example
- Example
- Examples
- Creating a table of contents
- Example
- Examples
- Examples
- Examples
- Examples
- Replace elements with a snippet
- Replace elements with a set of snippets
- Example
- Example
- Creating a Date object from a string
- Control Script API
- Examples
- Generating output
- Print output
- Email output
- Optimizing a template
- Generating Print output
- Saving Printing options in Print Presets
- Connect Printing options that cannot be changed from within the Printer Wizard
- Print Using Standard Print Output Settings
- Print Using Advanced Printer Wizard
- Adding print output models to the Print Wizard
- Splitting printing into more than one file
- Print output variables
- Generating Email output
- Print Manager
- Print Manager Introduction Video
- Print Manager usage
- Print Manager Interface
- Overview
- Connect 1.8 General Enhancements and Fixes
- Connect 1.8 Performance Related Enhancements and Fixes
- Connect 1.8 Designer Enhancements and Fixes
- Connect 1.8 Output Enhancements and Fixes
- Connect 1.8 Print Manager Enhancements and Fixes
- Known Issues
- Previous Releases
- Overview
- Connect 1.7.1 General Enhancements and Fixes
- Connect 1.7.1 Designer Enhancements and Fixes
- Connect 1.7.1 Output Enhancements and Fixes
- Known Issues
- Overview
- Connect 1.6.1 General Enhancements and Fixes
- Connect 1.6.1 Designer Enhancements and Fixes
- Connect 1.6.1 Output Enhancements and Fixes
- Known Issues
- Overview
- Connect 1.5 Designer Enhancements and Fixes
- Connect 1.5 Output Enhancements and Fixes
- Connect 1.5 General Enhancements and Fixes
- Known Issues
- Overview
- Connect 1.4.2 Enhancements and Fixes
- Connect 1.4.1 New Features and Enhancements
- Connect 1.4.1 Designer Enhancements and Fixes
- Connect 1.4.1 Output Enhancements and Fixes
- Known Issues
- Legal Notices and Acknowledgements

n Etcetera. See http://www.w3schools.com/cssref/css_selectors.asp for more
selectors and combinations of selectors.
l
A selector and text. This is text inside an HTML element (or several HTML
elements) with a specific HTML tag, class or ID. In the Text Script Wizard, click
Selector and text and type the selector and the text in the respective fields.
4.
Click the the downward pointing arrow in the first row in the column Field. Select a data
field from the list that appears.
5.
Add a Prefix and/or a Suffix. The prefix and suffix can contain text and/or HTML tags. If a
field is empty, the prefix and suffix will be ignored, which means you can add line returns
and static text, such as:
l with a Number field, Prefix: Your invoice (one space at the end), Suffix: is now ready
to be viewed!
l with a field LastName, Suffix <br/> (which adds a line break)
l with a field State, Prefix: , (comma then space).
For a comma between fields, use the Prefix of the second field, if you don’t want a
comma when the second field has no value.
6. The Wizard allows you to reformat the data (for example, apply uppercase, apply
thousand separators to numbers, etc.). Click the column Format, click the downward
pointing arrow and select one of the formats. See "Formatting variable data" on the facing
page.
7. Add as many data fields as you need, following the same procedure.
8.
Optionally, you can click Options to specify where and how the script inserts its results:
l
As HTML. HTML elements in the results are processed and displayed as HTML
elements. For instance, <b>this is bold</b> will be displayed as this is
bold. This is the default setting.
l
As text. This inserts the results as-is, meaning HTML tags and elements are
displayed as text in the output. In this scenario, "<br>" shows up in the text and does
not insert a line break.
l
As the value of an attribute of an HTML element. The selector of the script should
be an HTML element. Which attributes are available depends on the selected
HTML element. If the script's selector is an image (<img> element) for example, and
the attribute is src, the script will modify the image's source. The script's results
should be a valid value for the chosen attribute.
Page 251