
1.7


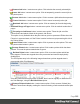


Table Of Contents
- Table of Contents
- Welcome to PrintShop Mail Connect 1.7.1
- Setup And Configuration
- System and Hardware Considerations
- Installation and Activation
- Where to Obtain the Installers
- Installation - important information
- Installation - How to guides
- Activation
- Installation Prerequisites
- User accounts and security
- The Importance of User Credentials on Installing and Running PrintShop Mail C...
- Installing PrintShop Mail Connect on Machines without Internet Access
- Installation Wizard
- Running connect installer in Silent Mode
- Activating a License
- Migrating to a new workstation
- Uninstalling
- The Designer
- Basic Steps
- Content elements
- Snippets
- Styling and formatting
- Personalizing Content
- Writing your own scripts
- Designer User Interface
- Script API
- Designer Scripts API
- Examples
- Examples
- Examples
- Examples
- Examples
- Examples
- Examples
- Examples
- Examples
- Examples
- Examples
- Examples
- Examples
- Example
- Example
- Example
- Example
- Example
- Examples
- Creating a table of contents
- Example
- Examples
- Examples
- Examples
- Examples
- Replace elements with a snippet
- Replace elements with a set of snippets
- Example
- Example
- Control Script API
- Generating output
- Print output
- Email output
- Optimizing a template
- Generating Print output
- Saving Printing options in Printing Presets.
- Connect Printing options that cannot be changed from within the Printer Wizard.
- Print Using Standard Print Output Settings
- Print Using Advanced Printer Wizard
- Adding print output models to the Print Wizard
- Splitting printing into more than one file
- Variables available in the Output
- Generating Tags for Image Output
- Generating Email output
- Print Manager
- General Information
- Release Notes
- Overview
- Connect 1.7.1 General Enhancements and Fixes
- Connect 1.7.1 Designer Enhancements and Fixes
- Connect 1.7.1 Output Enhancements and Fixes
- Known Issues
- Previous Releases
- Overview
- Connect 1.6.1 General Enhancements and Fixes
- Connect 1.6.1 Designer Enhancements and Fixes
- Connect 1.6.1 Output Enhancements and Fixes
- Known Issues
- Overview
- Connect 1.4.2 Enhancements and Fixes
- Connect 1.4.1 New Features and Enhancements
- Connect 1.4.1 Designer Enhancements and Fixes
- Connect 1.4.1 Output Enhancements and Fixes
- Known Issues
- Legal Notices and Acknowledgments

l
Ack Pages: The number of pages to send to the printer for printing
before sending an acknowledgement request.
Acknowledgement requests slow the printing process down, as the
printer needs to process the request and return the information.
The default Ack Pages number is 100 pages which means the Print
Manager will send an acknowledgement request to the printer in 100
page increments until the end of the job. Given the overhead in
processing such requests, the smaller the Page number, the slower the
printing becomes.
l
Create Trace File: Select this to log all communications to a log file.
This log file will appear in the same folder as the Spool file.
l
SNMP: Select this option to allow IPDSprinter(s) and Print Manager to
communicate back and forth.
This option is enabled by default, as it provides the greatest functionality.
Note
Not all IPDS printers will support SNMP, but most contemporary
printers are likely to.
l
End of Job Preferences (IPDS only) subsection: Select from these options
to determine job end processing.
l
Edge Marks: Select this to add an Edge Mark to the final page of a job.
Used to indicate job separation in Continuous Form printing.
l
Stack Receive Pages: Add blank pages to the end of the job in order to
push the completed job to the stacker.
l
Error Handling Preferences (IPDS only) subsection: Select these to STOP
printing upon encountering the following errors:
l
Undefined Character Check: If an undefined character is encountered
in the job. For example, the Euro symbol might be present in the job, but
missing from the printer.
Page 562