
1.7


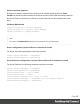


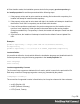

Table Of Contents
- Table of Contents
- Welcome to PrintShop Mail Connect 1.7.1
- Setup And Configuration
- System and Hardware Considerations
- Installation and Activation
- Where to Obtain the Installers
- Installation - important information
- Installation - How to guides
- Activation
- Installation Prerequisites
- User accounts and security
- The Importance of User Credentials on Installing and Running PrintShop Mail C...
- Installing PrintShop Mail Connect on Machines without Internet Access
- Installation Wizard
- Running connect installer in Silent Mode
- Activating a License
- Migrating to a new workstation
- Uninstalling
- The Designer
- Basic Steps
- Content elements
- Snippets
- Styling and formatting
- Personalizing Content
- Writing your own scripts
- Designer User Interface
- Script API
- Designer Scripts API
- Examples
- Examples
- Examples
- Examples
- Examples
- Examples
- Examples
- Examples
- Examples
- Examples
- Examples
- Examples
- Examples
- Example
- Example
- Example
- Example
- Example
- Examples
- Creating a table of contents
- Example
- Examples
- Examples
- Examples
- Examples
- Replace elements with a snippet
- Replace elements with a set of snippets
- Example
- Example
- Control Script API
- Generating output
- Print output
- Email output
- Optimizing a template
- Generating Print output
- Saving Printing options in Printing Presets.
- Connect Printing options that cannot be changed from within the Printer Wizard.
- Print Using Standard Print Output Settings
- Print Using Advanced Printer Wizard
- Adding print output models to the Print Wizard
- Splitting printing into more than one file
- Variables available in the Output
- Generating Tags for Image Output
- Generating Email output
- Print Manager
- General Information
- Release Notes
- Overview
- Connect 1.7.1 General Enhancements and Fixes
- Connect 1.7.1 Designer Enhancements and Fixes
- Connect 1.7.1 Output Enhancements and Fixes
- Known Issues
- Previous Releases
- Overview
- Connect 1.6.1 General Enhancements and Fixes
- Connect 1.6.1 Designer Enhancements and Fixes
- Connect 1.6.1 Output Enhancements and Fixes
- Known Issues
- Overview
- Connect 1.4.2 Enhancements and Fixes
- Connect 1.4.1 New Features and Enhancements
- Connect 1.4.1 Designer Enhancements and Fixes
- Connect 1.4.1 Output Enhancements and Fixes
- Known Issues
- Legal Notices and Acknowledgments

Selection Confirmation
The next page confirms the installation selections made. Click Next to start the installation
itself.
End User License Agreement
The next page displays the End User License Agreement, which needs to be read and
accepted before clicking Next.
Click Next to start the actual installation process. This process can take several minutes.
Completing the installation
This screen describes a summary of the components that have been installed.
l
Configure Update Check checkbox: This option is enabled by default. It causes the
Product Update Manager to run after the installation is complete. This allows
configuring PrintShop Mail Connect to regularly check for entitled updates.
Note: this checkbox may not be available in the event that an issue was encountered
during the installation.
l
Show Log... : If an issue was encountered during the installation, click this button to
obtain details. This information can then be provided to Objectif Lune for troubleshooting.
l When ready, click the Finish button to close the installation wizard, and initialize the
Product Update Manager, if it was selected.
The Product Update Manager
If the Configure Update Check option has been selected, the following message will be
displayed after clicking “Finish” in the setup:
Click “Yes” to install or open the Product Update Manager where the frequency with which the
updates can be checked and a proxy server (if required) can be specified.
Note: if the Product Update Manager was already installed by another Objectif Lune
application, it will be updated to the latest version and will retain the settings previously
specified.
Page 32