
1.6


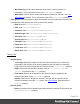
Table Of Contents
- Table of Contents
- Welcome to PrintShop Mail Connect 1.6.1
- Setup And Configuration
- System and Hardware Considerations
- Installation and Activation
- Installation Pre-Requisites
- User accounts and security
- The Importance of User Credentials on Installing and Running PrintShop Mail C...
- Installing PrintShop Mail Connect on Machines without Internet Access
- Installation Wizard
- Running Connect Installer in Silent Mode
- Activating a License
- Migrating to a new computer
- Uninstalling
- The Designer
- Generating output
- Optimizing a template
- Generating Print output
- Saving Printing options in Printing Presets.
- Connect Printing options that cannot be changed from within the Printer Wizard.
- Print Using Standard Print Output Settings
- Print Using Advanced Printer Wizard
- Adding print output models to the Print Wizard
- Splitting printing into more than one file
- Variables available in the Output
- Generating Tags for Image Output
- Generating Email output
- Print Manager
- Release Notes
- Copyright Information
- Legal Notices and Acknowledgments

l
Host: The SMTP server through which the emails are to be sent. Can be a host
(mail.domain.com) or an IP address. You can specify a port number as part of the
host name, for example: smtp.mandrillapp.com:465.
l
Use authentication: Check if a username and password are needed to send
emails through the host.
l
Start TLS: Enabled if authentication is checked. Sends emails through Transport
Layer Security (TLS), which is sometimes referred to as SSL.
l
User: Enter the username used to connect to the SMTP server.
l
Password: Enter the password for the above username.
Send Test Email
The Send Test Email dialog is used to generate mail output of a certain number of records and
send them to one recipient. To open this dialog, select File > Send Test Email, on the menu.
For more information about the process of sending out email and the possible settings, see
"Generating Email output" on page508.
Options for this dialog:
l
Fromgroup:
l
Name: Enter the name that should appear when sending emails. The name is
optional.
l
Email: Enter the email address that will appear as a Sender to the email recipient. A
single email address should be written.
l
Togroup:
l
Email address(es): Enter one or more email addresses where the test emails are
sent. Multiple emails can be separated by semicolons (;), and can be in the same
format as above. Note that every email here will receive all the emails for the record-
range below.
l
Use Litmus: Check to also send the emails to the Litmus test email set in the Email
Preferences (to go to the Email Preferences, select Window > Preferences, click
the arrow next to Email, and then click General). Disabled if no Litmus email is set.
Also see this how-to: Test your emails with Litmus.
Page 305