
1.6
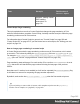
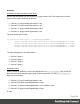

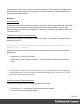


Table Of Contents
- Table of Contents
- Welcome to PrintShop Mail Connect 1.6.1
- Setup And Configuration
- System and Hardware Considerations
- Installation and Activation
- Installation Pre-Requisites
- User accounts and security
- The Importance of User Credentials on Installing and Running PrintShop Mail C...
- Installing PrintShop Mail Connect on Machines without Internet Access
- Installation Wizard
- Running Connect Installer in Silent Mode
- Activating a License
- Migrating to a new computer
- Uninstalling
- The Designer
- Generating output
- Optimizing a template
- Generating Print output
- Saving Printing options in Printing Presets.
- Connect Printing options that cannot be changed from within the Printer Wizard.
- Print Using Standard Print Output Settings
- Print Using Advanced Printer Wizard
- Adding print output models to the Print Wizard
- Splitting printing into more than one file
- Variables available in the Output
- Generating Tags for Image Output
- Generating Email output
- Print Manager
- Release Notes
- Copyright Information
- Legal Notices and Acknowledgments

Cloned sections have the same properties as normal sections, but they cannot call section
functions.
Note
Due to resource constraints, the number of clones that can be created is limited to around 20. This is
a rough estimate. If the template is simple and the number of clones that has to be made is the same
for each record, up to 60 clones may be created.
Renaming a clone
By default, clones receive the name of their source section with a "Clone {sequence}" suffix, for
example:
Source: "Section 1"
Clone Name: "Section 1 Clone 1"
Use thename property to assign the cloned section another name, for example:
clone.name = "my_section_clone";
Note that section names must be unique.
Targeting elements in a cloned section
As each clone receives a unique section name, one could use CSS style sheets (see "Styling
and formatting" on page168) and personalization scripts (see "Variable Data" on page209 and
"Writing your own scripts" on page221) to further personalize the cloned sections.
The following CSS style rules target the <h1> element in a number of clones and assigns the
respective text a different color:
[section="my_section_clone_0"] h1 { color: red; }
[section="my_section_clone_1"] h1 { color: green; }
[section="my_section_clone_2"] h1 { color: blue; }
The same selectors could be used in personalization scripts:
Selector: [section="my_section_clone_0"] h1
Script: results.css('color','red');
Page 249