
1.5
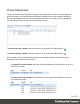


Table Of Contents
- Table of Contents
- Welcome to PrintShop Mail Connect 1.5
- Setup And Configuration
- System and Hardware Considerations
- Installation and Activation
- Installation Pre-Requisites
- User accounts and security
- The Importance of User Credentials on Installing and Running PrintShop Mail C...
- Installing PrintShop Mail Connect on Machines without Internet Access
- Installation Wizard
- How to Run Connect Installer in Silent Mode
- Activating a License
- Migrating to a new computer
- Uninstalling
- The Designer
- Generating output
- Print output
- Email output
- Optimizing a template
- Generating Print output
- Saving Printing options in Printing Presets.
- Connect Printing options that cannot be changed from within the Printer Wizard.
- Print Using Standard Print Output Settings
- Print Using Advanced Printer Wizard
- Adding print output models to the Print Wizard
- Splitting printing into more than one file
- Variables available in the Output
- Generating Tags for Image Output
- Generating Email output
- Print Manager
- Release Notes
- Copyright Information
- Legal Notices and Acknowledgments

Note
Requesting a printer's capabilities can take some time, and not all printers will
support it.
l
Capabilities: Each printer capability is listed under the Printer, in separate
divisions. Capabilities are read directly from the printer.
Job Queue pane
The Job Queue pane is a centralized location where all the jobs that are captured, added or
sent to the Print Manager are listed, whether they have been printed or not.
l
Filter: Type in a search word and hit Enter to filter the job queue. This searches the job
name. Clear and press Enter to remove the filtering.
l
Job Queue table:
l
Name: The name of the job filename, as captured or added to the Print Manager.
l
ID: The generated ID for the job. The first 2 letters of the ID indicate the origin of that
job:
l
HF: Hot Folder capture.
l
DR: Dragged and dropped directly into the Print Manager.
l
BR: Added via a Browse button.
l
RS: Resubmitted to the printer.
l
PDL: Displays the job printer language.
l
Page Count: Displays the total number of pages in the job.
l
Resolution: Displays the resolution, in DPI, of the job.
l
Page Size: Displays the dimensions of the job.
To the right of the table and also via right-mouse click context menu within the table, the
following options are available:
l
Copy selected items to clipboard button / Copy context menu option: This copies job
information (job name and folder path) to the clipboard.
Page 521