
1.5
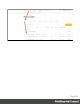
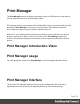
Table Of Contents
- Table of Contents
- Welcome to PrintShop Mail Connect 1.5
- Setup And Configuration
- System and Hardware Considerations
- Installation and Activation
- Installation Pre-Requisites
- User accounts and security
- The Importance of User Credentials on Installing and Running PrintShop Mail C...
- Installing PrintShop Mail Connect on Machines without Internet Access
- Installation Wizard
- How to Run Connect Installer in Silent Mode
- Activating a License
- Migrating to a new computer
- Uninstalling
- The Designer
- Generating output
- Print output
- Email output
- Optimizing a template
- Generating Print output
- Saving Printing options in Printing Presets.
- Connect Printing options that cannot be changed from within the Printer Wizard.
- Print Using Standard Print Output Settings
- Print Using Advanced Printer Wizard
- Adding print output models to the Print Wizard
- Splitting printing into more than one file
- Variables available in the Output
- Generating Tags for Image Output
- Generating Email output
- Print Manager
- Release Notes
- Copyright Information
- Legal Notices and Acknowledgments

1. "Printers pane" on the facing page
2. "Printer Queue pane" on page519
3. "Printer Capabilities pane" on page520
4. "Job Queue pane" on page521
5. "History pane" on page522
6. "Printer Status pane" on page523
7. "Messages pane" on page524
Menu options
l
Windows > Preferences ...:The PrintShop Mail Connect Print Manager general settings
can be changed via the Windows > Preferences ... menu option. Information on the
preferences available can be found on this page:"Print Manager Preferences" on
page524.
l
Windows > Reset Perspective:The PrintShop Mail Connect Print Manager perspective
can be reset via the Windows > Reset Perspective menu option. This returns all the
Print Manager panes (which can be moved around as desired)to their original default
positions.
Page 515