
1.5
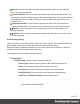
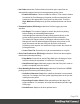
Table Of Contents
- Table of Contents
- Welcome to PrintShop Mail Connect 1.5
- Setup And Configuration
- System and Hardware Considerations
- Installation and Activation
- Installation Pre-Requisites
- User accounts and security
- The Importance of User Credentials on Installing and Running PrintShop Mail C...
- Installing PrintShop Mail Connect on Machines without Internet Access
- Installation Wizard
- How to Run Connect Installer in Silent Mode
- Activating a License
- Migrating to a new computer
- Uninstalling
- The Designer
- Generating output
- Print output
- Email output
- Optimizing a template
- Generating Print output
- Saving Printing options in Printing Presets.
- Connect Printing options that cannot be changed from within the Printer Wizard.
- Print Using Standard Print Output Settings
- Print Using Advanced Printer Wizard
- Adding print output models to the Print Wizard
- Splitting printing into more than one file
- Variables available in the Output
- Generating Tags for Image Output
- Generating Email output
- Print Manager
- Release Notes
- Copyright Information
- Legal Notices and Acknowledgments

MailJet
Dashboard: https://app.mailjet.com/dashboard
Documentation: https://app.mailjet.com/docs/emails_headers
Sample Control Script to assign a campaign:
merge.context.sections["Content"].headers = {
"X-Mailjet-Campaign": "invoices"
};
Note
Mailjet strips out their own mailheaders like X-Mailjet-Campaign. The results can only be verified
via the respective campaign stats page in the Mailjet dashboard. There is no need to pre-create the
campaign: adding it to the email header via a Control Script auto-generates the campaign. To view
the campaign, login to Mailjet and choose: Campaigns > All.
Page 512