
1.5
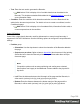
Table Of Contents
- Table of Contents
- Welcome to PrintShop Mail Connect 1.5
- Setup And Configuration
- System and Hardware Considerations
- Installation and Activation
- Installation Pre-Requisites
- User accounts and security
- The Importance of User Credentials on Installing and Running PrintShop Mail C...
- Installing PrintShop Mail Connect on Machines without Internet Access
- Installation Wizard
- How to Run Connect Installer in Silent Mode
- Activating a License
- Migrating to a new computer
- Uninstalling
- The Designer
- Generating output
- Print output
- Email output
- Optimizing a template
- Generating Print output
- Saving Printing options in Printing Presets.
- Connect Printing options that cannot be changed from within the Printer Wizard.
- Print Using Standard Print Output Settings
- Print Using Advanced Printer Wizard
- Adding print output models to the Print Wizard
- Splitting printing into more than one file
- Variables available in the Output
- Generating Tags for Image Output
- Generating Email output
- Print Manager
- Release Notes
- Copyright Information
- Legal Notices and Acknowledgments

Note
If Imposition options such as auto-positioning and scaling were selected, these options
won't apply to the Additional Content added to the physical N-Up sheet.
l
Left: Enter the distance between the left margin of the page and the Text, in either
metric (cm/mm), inch (in), pixel (px) or point (pt) values.
l
Bottom: Enter the distance between the bottom margin of the page and the Text, in
either metric (cm/mm), inch (in), pixel (px) or point (pt) values.
l
Font group:
l
Font Name: Use the drop-down to select which font type to apply to the Text. The
drop-down displays all the fonts installed on the system.
l
Font Size: Enter the font size in points (pt).
l
Bold: Check to make the Text bold.
l
Italic: Check to make the Text italic.
l
Color: Select what color the Text will be.
l
Text: Enter the actual Text to appear on the page in the selected location. The Text can
be spread over multiple lines, but no additional formatting can be added within this edit
box. The entire Text will be printed use the formatting options selected in the Font group.
l
Add: Click to display a list of variable data that can be added to the Text. This
includes metadata fields added in the Metadata Options, as well as some document
information fields.
l
Condition: Enter the condition which determines whether or not the Text will be added to
the document at print time.
For details on how to create a conditional, see the Conditionals page.
Image Settings
The Image dialog displays the properties of the image added in the "Additional Content" on
page360 page.
Page 364