
1.5
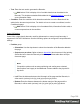
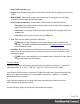
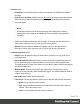
Table Of Contents
- Table of Contents
- Welcome to PrintShop Mail Connect 1.5
- Setup And Configuration
- System and Hardware Considerations
- Installation and Activation
- Installation Pre-Requisites
- User accounts and security
- The Importance of User Credentials on Installing and Running PrintShop Mail C...
- Installing PrintShop Mail Connect on Machines without Internet Access
- Installation Wizard
- How to Run Connect Installer in Silent Mode
- Activating a License
- Migrating to a new computer
- Uninstalling
- The Designer
- Generating output
- Print output
- Email output
- Optimizing a template
- Generating Print output
- Saving Printing options in Printing Presets.
- Connect Printing options that cannot be changed from within the Printer Wizard.
- Print Using Standard Print Output Settings
- Print Using Advanced Printer Wizard
- Adding print output models to the Print Wizard
- Splitting printing into more than one file
- Variables available in the Output
- Generating Tags for Image Output
- Generating Email output
- Print Manager
- Release Notes
- Copyright Information
- Legal Notices and Acknowledgments

Additional Barcodes
Barcodes are added at specific positions. This dialog displays all the configured additional
Barcode settings:
l
Left: Displays the distance between the left margin of the page and the Barcode .
l
Bottom: Displays the distance between the bottom margin of the page and the Barcode .
l
Orientation: Displays the orientation of the Barcode .
l
Type: Displays the type of Barcode that's added.
l
Text: Displays a preview of the Barcode contents.
l
Condition: Displays a preview of the condition.
l
Add: Click to add a Barcode. Select from the list of Barcode types that appears. The
Additional Barcode Settings page lists all the available Barcodes, and links to their
options..
l
Delete: Click to delete the currently selected Barcode entry.
l
Edit: Click to edit the currently selected Barcode entry using the Additional Barcode
Settings dialog.
l
Duplicate: Click to create a copy of the barcode entry.
Additional OMRMarks
Optical Mark Recognition (OMR)marks are added at specific positions, with optional dimension
constrains. This dialog displays all the configured additional image settings:
l
Left: Displays the distance between the left margin of the page and the OMRmark.
l
Bottom: Displays the distance between the bottom margin of the page and the
OMRmark.
l
Orientation: Displays the orientation of the OMRmark.
l
Condition: Displays the condition which is used to determine if the OMRmark is to be
included or not.
l
Add: Click to open the "OMR Mark Settings" on page387 dialog to add a new text
entry.
l
Delete: Click to delete the currently selected entry.
Page 362