
1.5


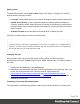
Table Of Contents
- Table of Contents
- Welcome to PrintShop Mail Connect 1.5
- Setup And Configuration
- System and Hardware Considerations
- Installation and Activation
- Installation Pre-Requisites
- User accounts and security
- The Importance of User Credentials on Installing and Running PrintShop Mail C...
- Installing PrintShop Mail Connect on Machines without Internet Access
- Installation Wizard
- How to Run Connect Installer in Silent Mode
- Activating a License
- Migrating to a new computer
- Uninstalling
- The Designer
- Generating output
- Print output
- Email output
- Optimizing a template
- Generating Print output
- Saving Printing options in Printing Presets.
- Connect Printing options that cannot be changed from within the Printer Wizard.
- Print Using Standard Print Output Settings
- Print Using Advanced Printer Wizard
- Adding print output models to the Print Wizard
- Splitting printing into more than one file
- Variables available in the Output
- Generating Tags for Image Output
- Generating Email output
- Print Manager
- Release Notes
- Copyright Information
- Legal Notices and Acknowledgments

legend. Note that initially the legend is not visible. To make it visible, check the option
Show legend in the chart's properties (see "Business graphic properties" below).
6. Close the dialog and go in Preview mode in the Workspace to view the result.
Changing a business graphic
Chart script
The script related to a business graphic determines which values are used to generate the
graphic. Double-click the script on the Scripts pane to change this.
Tip
To find the script that fills the chart, hover over the names of the script in the Scripts pane. That
script will highlight the chart in the template and its selector is the same as the ID of the business
graphic (preceded by #).
For an explanation of the options in the Script wizard, see step 5 of "Adding a business
graphic" on page147.
Business graphic properties
A chart is always added with the chart's default properties. To change those properties, such as
the colors and the legend, open the Chart properties dialog: right-click the business graphic (on
the Design tab in the Workspace) and select the respective business graphic on the shortcut
menu.
For an overview of all properties, see:
l "Dialogs" on page251
l "Line Chart Properties dialog" on page266
l "Pie Chart Properties dialog" on page274.
Date
The Date element inserts the current system date, optionally making it dynamic so that it
updates whenever the template is viewed or produces output.
Page 149