
1.4


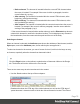

Table Of Contents
- Table of Contents
- Welcome to PrintShop Mail Connect 1.4.2
- Setup And Configuration
- The Designer
- Mark Position Options
- Additional Text Settings
- Additional Image Settings
- Barcode Options
- Codabar Settings
- Code 128 Settings
- Code 39 Settings
- Additional Datamatrix Settings
- Additional EAN 128 Settings
- Additional EAN 13 Settings
- Additional EAN 8 Settings
- Additional Interleave 2 of 5 Settings
- Additional PDF417 Settings
- Additional QR Code Settings
- Additional UPC A Settings
- Additional UPC E Settings
- Additional OMR Mark Settings
- Keystore
- PDF Signature
- Print Manager
- Copyright Information
- Legal Notices and Acknowledgements

To add an ID and/or class to an element that has already been added to a template, select the
element (see "Selecting an element" on the facing page) and type an ID and/or a class in the
respective fields on the Attributes pane at the top right.
Other attributes
Apart from the ID and class, elements can have a varying number of properties, or 'attributes' as
they're called in HTML (see "Editing HTML" on the previous page). Which properties an
element has, depends on the element itself. An image, for example, has at least four attributes:
src (the image's URL), alt (alternate text), width and height. These attributes are visible on the
Attributes pane when you click an image in the content.
For each type of element, a small selection of attributes is visible on the Attributes pane at the
top right.
Changing attributes via script
Many attributes can be changed via the user interface. Another way to change attributes is by
using a script.
Any of the Script Wizards can produce a script that changes an attribute of an HTML element.
Set the Options in the Script Wizard to Attribute, to output the script's results to the value of a
specific attribute. See "Using the Text Script Wizard" on page 161.
In code, you can change an element's attribute using the function attr(); see "Write your own
scripts" on page 195 and "API" on page 27.
Inserting an element
To insert an element in the content of a template:
1.
Click the respective toolbar button. Alternatively, click the element on the Insert menu.
2. Add an ID and/or a class. ID's and classes are particularly useful with regard to variable
data (see "Personalizing Content" on page 151) and styling (see "Styling templates with
CSS files" on page 219).
3.
Use the Location drop-down to select where to insert the element.
l
At cursor position: The element is inserted where the cursor is located in the
template.
Page 75