
1.4


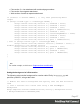


Table Of Contents
- Table of Contents
- Welcome to PrintShop Mail Connect 1.4.2
- Setup And Configuration
- The Designer
- Mark Position Options
- Additional Text Settings
- Additional Image Settings
- Barcode Options
- Codabar Settings
- Code 128 Settings
- Code 39 Settings
- Additional Datamatrix Settings
- Additional EAN 128 Settings
- Additional EAN 13 Settings
- Additional EAN 8 Settings
- Additional Interleave 2 of 5 Settings
- Additional PDF417 Settings
- Additional QR Code Settings
- Additional UPC A Settings
- Additional UPC E Settings
- Additional OMR Mark Settings
- Keystore
- PDF Signature
- Print Manager
- Copyright Information
- Legal Notices and Acknowledgements

// Specify the path
var resourceUrl = 'images/policy-' + record.fields.policy + '.pdf';
merge.template.contexts.PRINT.sections['Policy'].background.url =
resourceUrl;
Positioning the background of a Print section
Using abolute positioning
var activeSection = merge.template.contexts.PRINT.sections['Section
1'];
activeSection.background.source = BackgroundResource.RESOURCE_PDF;
activeSection.background.position = MediaPosition.ABSOLUTE;
activeSection.background.left = "10mm";
activeSection.background.top = "10mm";
activeSection.background.url = "images/somepage.pdf";
Scaling to Media size
var activeSection = merge.template.contexts.PRINT.sections['Section
1'];
activeSection.background.source = BackgroundResource.RESOURCE_PDF;
activeSection.background.position = MediaPosition.FIT_TO_MEDIA;
activeSection.background.url = "images/somepage.pdf";
Basic Steps
With the Designer you can create templates for personalized letters and emails, and generate
output from them.
These are the basic steps for creating and developing a template:
1.
Create a template
Create a template, using one of the Template Wizards. See "Creating a template" on
page 243.
2.
Fill the template
Add text, images and other elements to the template and style them. See "Content
elements" on page 72 and "Styling and formatting" on page 217.
3.
Personalize the content
Personalize the content using variable data. See "Personalizing Content" on page 151.
Page 68