
1.2


PSM Connect Installation and Activation Guide
5
Installation Wizard
Starting the PrintShop Mail Connect installer
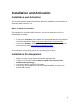
The PrintShop Mail Connect installer may be supplied as an ISO image or on a
DVD:
If an ISO image, either burn the ISO onto a DVD or unzip the contents to a
folder (keeping the folder structure)
If on a DVD, either insert the DVD and initiate the installation from there or
copy the contents to a folder (keeping the folder structure)
You then need to navigate to the PrintShopMail_Connect_Setup_x64.exe or and
double-click on it. After a while the Setup Wizard will appear to guide you through
the installation steps.
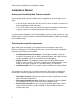
Selecting the required components
After clicking the Next button, the components screen appears, where the
different components of PrintShop Mail Connect can be selected for installation.
Currently, the following are available:
PrintShop Mail Connect Designer: The Designer module. It may be
used as a standalone with no other installed modules, but it will not have
certain capabilities such as automation and commingling.
MySQL Product: The database used by the PrintShop Mail Connect
Engine to save its items. This item is optional if an existing MySQL server,
either on the same computer or a separate server, is to be used.
Installation Path: This is the location where modules are to be installed.
The installer also allows you to calculate how much disk space is required for
installing the selected components and to see how much space is available:
Disk space required: Displays the amount of space required on the disk
by the selected components.
Disk space available on drive: Displays the amount of space available
for installation on the drive currently in the Installation Path.
Recalculate disk space: Click to re-check available disk space. This is
useful if space has been made available for the installation while the
installer was open.