
7.2

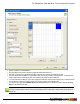
Table Of Contents
- Copyright Information
- Table of Content
- Overview
- Getting Started
- Understanding PlanetPress Suite Workflow Tools
- The Nature of PlanetPress Suite Workflow Tools
- The Three Flavors of the PlanetPress Suite Workflow Tools
- Terms and Definitions
- About Configurations
- About Processes
- About Subprocesses
- About Tasks
- About Branches and Conditions
- About Data
- About Data Selections
- About Data Emulation
- About Related Programs and Services
- About Documents
- About Printing
- The PlanetPress Suite Workflow Tools Configuration Program
- Start the PlanetPress Suite Workflow Tools Configuration Program
- The PlanetPress Suite Button
- Create a New Configuration
- Open a PlanetPress Suite Configuration File
- Saving and Sending a Configuration
- Save your Configuration
- Send your Configuration
- Import Processes from Another Configuration File
- Import Documents
- Import PrintShop Mail Documents
- Change the Interface Language
- Exit the PlanetPress Suite Workflow Tools Configuration Program
- The Quick Access Toolbar
- The PlanetPress Suite Ribbon
- The Configuration Components Pane
- Add a PlanetPress Suite Process
- Manipulate Local Variables
- Activate or Deactivate a Process
- Convert a Branch to a Subprocess
- Manipulate Global Variables
- Access Process Properties
- View Document Properties
- Add Resident Documents in the Configuration Components Pane
- Associate Documents and PlanetPress Watch Printer Queues
- Using the Clipboard and Drag & Drop
- Rename Objects in the Configuration Components Pane
- Reorder Objects in the Configuration Components Pane
- Grouping Configuration Components
- Expand and Collapse Categories and Groups in the Configuration Components Pane
- Delete Objects and Groups from the Configuration Components Pane
- The Process Area
- Zoom In or Out within Process Area
- Adding Tasks
- Adding Branches
- Edit a Task
- Replacing Tasks, Conditions or Branches
- Remove Tasks or Branches
- Task Properties Dialog
- Cutting, Copying and Pasting Tasks and Branches
- Moving a Task or Branch Using Drag-and-Drop
- Ignoring Tasks and Branches
- Resize Rows and Columns of the Process Area
- Selecting Documents in Tasks
- Highlight a Task or Branch
- Undo a Command
- Redo a Command
- The Plug-in Bar
- The Object Inspector Pane
- The Debug Information Pane
- The Message Area Pane
- Customizing the Program Window
- Preferences
- General User Options
- Object Inspector User Options
- Configuration Components Pane User Options
- Default Configuration User Options
- Notification Messages Preferences
- Sample Data User Options
- Network User Options
- PlanetPress Capture User Options
- Logging User Options
- Messenger User Options
- HTTP Server Input User Options
- HTTP Server Input 2 User Options
- LPD Input Preferences
- Serial Input Service User Options
- Telnet Input User Options
- PlanetPress Fax User Options
- FTP Output Service User Options
- PlanetPress Image User Options
- LPR Output User Options
- PrintShop Web Connect Service User Options
- Editor Options
- Advanced SQL Statement dialog
- Access Manager
- SOAP Access
- Working With Variables
- Data in PlanetPress Suite Workflow Tools
- Task Properties Reference
- Input Tasks
- Initial and Secondary Input Tasks
- Create File Input Task Properties
- Folder Capture Input Task Properties
- Folder Listing Input Task Properties
- Concatenate PDF Files Input Task Properties
- Email Input Task Properties
- Error Bin Input Task Properties
- FTP Input Task Properties
- HTTP Client Input Task Properties
- WinQueue Input Task Properties
- HTTP Server Input Task Properties
- LPD Input Task Properties
- Serial Input Task Properties
- PrintShop Web Connect Input Task Properties
- Telnet Input Task Properties
- SOAP Input Task Properties
- Action Tasks
- Add Document Action Properties
- Add/Remove Text Action Properties
- Search and Replace Action Task Properties
- Advanced Search and Replace Action Task Properties
- Create PDF Action Task Properties
- Decompress Action Task Properties
- Change Emulation Action Task Properties
- External Program Action Task Properties
- Download to Printer Action Task Properties
- Load External File Action Properties
- Rename Action Task Property
- Set Job Infos and Variables Action Task Properties
- Windows Print Converter Action Task Properties
- Standard Filter Action Task Properties
- Translator Action Task Properties
- PlanetPress Database Action Task Properties
- XSLT Editor Action Task Properties
- Send Images to Printer Action Task Properties
- Send to Folder Action Task Properties
- Run Script Action Task Properties
- Microsoft® Word® To PDF Action Task Properties
- Create MRDX Action Task Properties
- PrintShop Mail Action Task Properties
- Process Logic Tasks
- Branch Properties
- Comment Properties
- Conditions
- File Name Condition Properties
- File Size Condition Properties
- SNMP Condition Properties
- Text Condition Properties
- Time of Day Condition
- Splitters
- About Using Emulations with Splitters
- Database Splitter Action Task Properties
- Emulated Data Splitter Action Task Properties
- In-Stream Splitter Action Task Properties
- PDF Splitter Action Task Properties
- XML Splitter Action Task Properties
- Generic Splitter Action Task Properties
- Loop Action Task Properties
- Send to Process Task Properties
- Metadata Tasks
- Barcode Scan Action Task Properties
- Create Metadata Action Task Properties
- Embed/Extract PlanetPress Suite Metadata
- Lookup in Microsoft® Excel® Documents Action Task Properties
- Metadata Fields Management Task Properties
- Metadata Filter Action Task Properties
- Metadata Level Creation Action Task Properties
- Metadata Sequencer Action Task Properties
- Metadata Sorter Task Properties
- Metadata-Based N-Up Task Properties
- Rule Interface
- Output Tasks
- Delete Output Task Properties
- FTP Output Task Properties
- Laserfiche Repository Output Task Properties
- Printer Queue Output Task Properties
- Print Using a Windows Driver Output Task Properties
- SOAP Client Task Properties
- Send Email Output Task Properties
- Send to Folder Output Task Properties
- Output to SharePoint Action Task Properties
- About PlanetPress Fax
- PlanetPress Fax Output Task Properties
- Captaris RightFax Configuration
- About PlanetPress Image
- PlanetPress Image Output Task Properties
- Digital Action Task Properties
- Overview of the PDF/A and PDF/X Standards
- Variable Properties
- Unknown Tasks
- Masks
- Input Tasks
- PlanetPress Capture
- The 3 steps to a PlanetPress Capture workflow
- PlanetPress Capture Glossary
- Anoto Digital Pen
- Anoto Functionality Statement
- Anoto Pattern
- Capture Condition
- Capture-Ready Document
- Capture Document Manager
- Capture Field
- Capture Fields Generator
- Capture Fields Processor
- Client/Server Architecture
- Closed Document
- Contamination
- Get Capture Document
- ICR (Intelligent Character Recognition)
- Ink Data
- Open Document
- Pattern Sequence
- Pen ID
- PGC File
- Pidget
- PlanetPress Capture Database
- Trace Code
- General Considerations
- Security Considerations
- Capture Fields Processor Action Task
- Get Capture Document Action Task
- Printer Queues and Documents
- PlanetPress Suite Workflow Tools Printer Queues
- Printer Queue Advanced Properties
- Windows Output Printer Queue Properties
- LPR Output Printer Queue Properties
- FTP Output Printer Queue Properties
- Send to Folder Printer Queue Properties
- PlanetPress Suite Workflow Tools and PlanetPress Design Documents
- Variable Content Document File Formats: PTZ, PTK and PS
- PlanetPress Suite Workflow Tools and Printshop Mail Documents
- Load Balancing
- Location of Documents and Resources
- Debugging PlanetPress Suite Processes
- Error Handling
- Using Scripts
- Index

configuration to your PlanetPress Suite Workflow Tools service (see "Send your Configuration" (page 32)).
To activate or deactivate a process:
l Right-click the process in question in the Configuration Components Pane
l Click Active to disable or enable the process.
l Send your configuration.
If you try to send a configuration that contains only inactive processes, the PlanetPress Suite Workflow Tools Con-
figuration program will ask you to confirm the operation (this can be changed in the Notification User Options).
Convert a Branch to a Subprocess
To allow for maximum flexibility and backward compatibility with the subprocess feature, the Convert to subprocess
option lets users transform existing processes easily. This option is available whenever a Branch task is selected; right-click-
ing on it will display the contextual menu, which holds the Convert to subprocess option.
Selecting this option automatically creates a new subprocess, takes the branch and all of its children tasks and inserts it in the
new subprocess, including the branch task itself. In the main process, the branch is removed and replaced with a GoSub
action task referring to the newly created subprocess.
Note: The Branch tasks options Backup job file, Backup job information and Backup emulation, are also auto-
matically passed to the Subprocess, which means that, if the subprocess needs to use a different emulation than the calling
process, a Change Emulation task is required.
If any task converted into a subprocess was previously using local variables, these variables must be removed or transferred
to global variables or job information to be usable in the newly created subprocess.
Manipulate Global Variables
For information about Local Variables see Local Variables.
Global Variables are set at the level of the Configuration file and are shared between all processes and tasks. Global variables
can be used anywhere that accepts variables by using it's name preceded by "global."and surrounded by curly brackets (for
example:%{global.myGlobalVariable}).
Global variables are generally used to keep information that applies to multiple locations but need to be changed easily. For
example, a lot of uses use them to set a server's IP, a printer name, or folder location that is used by multiple processes. This
is useful when moving the configuration file to another installation of the Workflow Tools where this information is different, or
to quickly modify specific information if something changes on the server. You can have as many global variable as you want
in any given configuration.
To add a global variable from the Configuration Components Pane:
1. Right-Click on Global Variables
2. Click Insert, then Insert Global Variable.
The new variable will appear as GlobalVar or GlobalVarX (the name is automatically incremented).
To add a global variable from the Ribbon:
1. Click on the Home tab of the PlanetPress Suite Ribbon
2. Click Global Variable in the Variables group.
The new variable will appear as GlobalVar or GlobalVarX (the name is automatically incremented).
To set the value of a global variable from the Configuration Components Pane:
The PlanetPress Suite Workflow Tools Configuration Program
©2010 Objectif Lune Inc - 41 -