
User manual


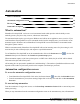
Table Of Contents
- Copyright Information
- Table of Contents
- Overview
- Configuration/Cover Page
- Getting Started
- The PlanetPress EnvelopeNOW Home Screen
- Create a new project
- Modify an existing project
- Print your job
- Configuration
- Automation
- Troubleshooting
- Contact Us
- Glossary
- Index

Combining conditions
Creating a new condition
To create a new condition, click the button. Define a new region selection in your preview for this new con-
dition. Select the condition type and modify the content of the text box, if appropriate.
The changes condition should only be used as the last condition in the set. If it is not the last, it may not function
correctly.
Deleting a condition
To delete a condition, go to the condition you want to delete and click the button. The condition will be
removed.
Navigating between conditions
To navigate between conditions, click the and buttons. The label between the buttons indicates the number
of conditions and the currently visible one (for example, 1/2).
Selecting how conditions are combined
You can combine the conditions in two ways:
l All conditions are met:The condition will only become true if ALLthe combined conditions are true.
l At least one condition is met:The condition will be true if ANY of the combined conditions is true.
Define 2-Sided Printing
A step-by-step animation of this section is available online on http://www.ppenvelopenow.com/support/
1. Settings
This option is used to prepare the job that PlanetPress EnvelopeNOW sends to the printer. It changes two things:
l The addition of extra pages:If your job will print in long-edge or short-edge and you select the correct
option here, an addition blank page will be added at the end of each mail piece when that mail piece has
an odd number of pages. This forces the first page of the next mail piece to always be on the front of a
sheet.
l The position of the scan marks:If you place your scan marks on the back of the page, using long-edge
or short-edge correctly will determine the exact location of the scan marks on the back, so your Folder
Inserter knows where to read them. If you do not select the correct option, the Folder Inserter may not be
able to see your scan marks.
If your job is single sided and you are printing the scan marks on the front, simply select "None".
Create a new project
©2010 Objectif Lune Inc - 21 -