
User Manual


User's guide O&O DiskImage Add as Job – General information
Add as Job – General information
Before setting up a job, you’ll have to select an activity.
1. On the start page, click the activity you want to perform, e.g. Drive imaging, or File
backup.
2. Select a drive or, in case of a file backup, a folder.
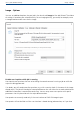
3. Click Options if you want to specify certain settings for a job, such as the imaging method,
encryption, or compression. Your settings will then be saved and applied to the subsequent
job.
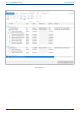
4. Now click the symbol Add as job.
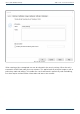
5. Enter the name of your job in the dialog. It will later be used for the creation of the report
and serve as reference. The name of the job has only symbolic meaning and may already be
applied to other jobs.
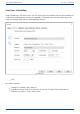
6. Specify further settings such as scheduling, notification, imaging, etc.
In the field Notes you may enter text for providing a few details about the job.
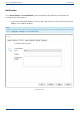
Job enabled
If you don't wish to run a job for a short period of time but don’t want to delete it altogether, you
may disable it. The job will then not be run until you enable it once again.
115 / 235