
User`s guide
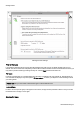
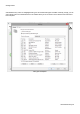
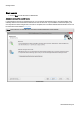
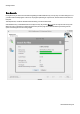
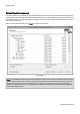

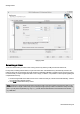
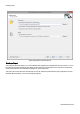
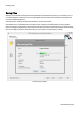
Table Of Contents
- About O&O DiskRecovery 10
- System requirements
- Installation
- Quick Start
- Getting started
- File types and signatures
- Optimize data search and rescue
- Starting O&O DiskRecovery Without Prior Installation
- Support and Contact
- End user license agreement 4.0 (EULA)
Getting started
O&O DiskRecovery-23
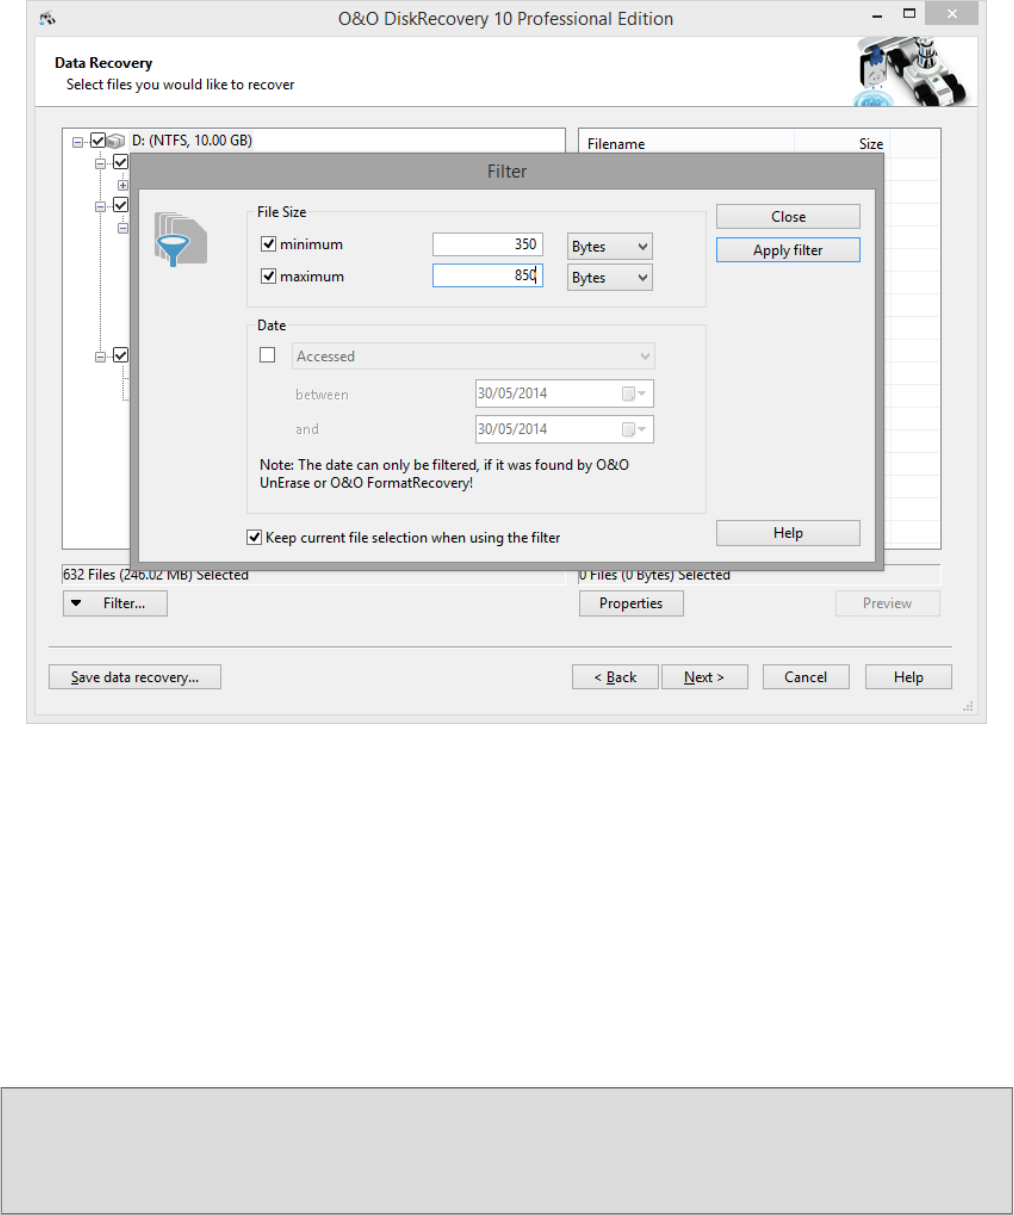
Applying a filter
Select target folder
To recover selected files you need to enter a saving location. By default your 'My Documents' folder is set,
but any folder, including network folders, may be selected for this. O&O DiskRecovery automatically creates a sub-
folder into which the recovered files are saved. Because an individual subfolder is created for every file type recovered,
it is advised that you select a target folder that is new or empty. In addition, it is possible to create a report regarding the
completed data recovery.
l Enter the target folder for the data to be rescued. If it does not exist yet, it will be created automatically. Confirm
the corresponding dialogue question.
l Click Next to initiate the recovery of data.
Note: Please bear in mind that the target folder cannot be located on the same partition from where the data is to be
restored! Also do not forget to make sure you have enough storage capacity on disk to facilitate the newly recovered
files. If you only have one partition (e.g. only "C:"), you will need an external disks to save the data to be restored,
e.g. USB Stick.