LEGAL NOTICES ©2001 by ScanSoft, Inc. All rights reserved. No part of this publication may be transmitted, transcribed, reproduced, stored in any retrieval system or translated into any language or computer language in any form or by any means, mechanical, electronic, magnetic, optical, chemical, manual, or otherwise, without prior written consent from the Legal Department at ScanSoft, Inc., 9 Centennial Drive, Peabody, Massachusetts 01960. Printed in the United States of America and in the Netherlands.
C O N T E N T S W e lc o me 7 Chapter outline Using this Guide How to use online Help Other online resources New features in OmniPage Pro X 1 I n st a l la t io n a n d se t u p 11 System requirements Installing the software Running the program under Mac OS 9 Starting OmniPage Pro Selecting your scanner Registering OmniPage Pro Removing OmniPage Pro 2 7 8 8 9 10 I n tr od u c ti on 12 12 13 14 14 18 18 19 What is Optical Character Recognition? Beyond OCR Basic steps in the OCR process The OCR
3 P r o c es s i n g d o c u m e n ts Basic processing steps Automatic processing To prepare for automatic processing To process a new document automatically To process an existing document automatically Manual processing Steps for manual processing Using automatic and manual processing together Using the OCR Assistant Bringing page images into OmniPage Pro Scanning pages Loading image files Opening OmniPage Documents Using drag-and-drop Creating and modifying zones Creating zones automatically Specifying
Listening to a document Closing a document Quitting OmniPage Pro Exporting documents Saving an OmniPage Document Saving images Saving recognition results Saving to Portable Document Format (PDF) Copying a document to the Clipboard Using drag-and-drop functionality Direct OCR Using Direct OCR 4 S e tt in g s 69 OCR Toolbar options Get Page options Original Layout options Style Set options OCR options Export options Preference settings Scanner settings OCR settings Spelling settings Miscellaneous settings
Te c h n i c a l i n fo r m a t io n Troubleshooting Solutions to try first Low memory situations Low disk space situations Improving accuracy Improving fax recognition Interface problems and solutions System failure during OCR Supported languages Supported saving formats Supported image file formats Index vi C o n t en t s 103 104 104 104 105 105 108 109 109 110 111 112 113
Welcome Welcome to OmniPage Pro X ™, and thank you for buying our software! This User’s Guide has been provided to help you get started and give you an overview of the program. Chapter outline Chapter 1, Installation and setup, tells you how to install and start the program and select a scanner. It lists the system requirements and provides guidance on registering the product. Chapter 2, Introduction, explains the OCR process and how it forms part of the OmniPage Pro workflow.
Using this Guide This Guide supposes that you know how to work in the Macintosh® environment. Please refer to your Macintosh help resources if you have questions about how to use dialog boxes, menus, scroll bars, and so on. The following conventions are used in this Guide. Convention Italicized text Purpose • Emphasizes menu commands, dialog box options, button and file names: “Choose Open... in the File menu.” • Names sections in this Guide. • Emphasizes new terms the first time they are used.
t To get help on buttons and pop-up menus Brief help is available without opening the online Help system. Hover the cursor over any button or pop-up list in the OCR Toolbar or the palettes. A concise description of the control appears in the status line along the base of the OCR Toolbar. t To get help on topics and procedures Select Help Index in OmniPage Pro’s Help menu. Begin to type in a keyword you want to find.
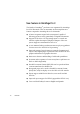
New features in OmniPage Pro X The family of OmniPage® products is now augmented by OmniPage Pro X for Macintosh. Here we summarize its most important new features compared to OmniPage Pro 8 for Macintosh. 10 Welcome u A better recognition engine has been integrated, capable of delivering greater accuracy, particularly on degraded documents. u Support for the Mac® OS X operating system. A revised user interface exploits the improved display techniques of the new system.
Chapter 1 Installation and setup This chapter provides information on installing OmniPage Pro X and selecting a scanner to use with it. Please consult the Readme file which provides the most up-to-date information on installing and running the program. Readme is supplied in plain text and PDF formats. These files are copied from the CD to the OmniPage Pro X folder during installation. This User’s Guide is also supplied in PDF format. It is copied to the sub-folder User’s Guide.
System requirements The minimum system requirements for OmniPage Pro X are: u iMac, iBook, PowerBook, Power Macintosh or PowerPC compatible computers with at least a G3 processor u Mac OS 9.0 or later, Mac OS X (10.1 or above) and QuickTime 4.
Chapter 1 Personalize your copy in the dialog box that appears. Type in your name, the name of your company and the serial number. You will find the serial number on the CD case. Click OK. Click Install in the next dialog box to proceed. A further dialog box lets you choose where the OmniPage Pro files will be installed. Select a drive and optionally a folder location (using Open or New) and click Choose. The program will be installed in a folder named OmniPage Pro X.
Starting OmniPage Pro There are several ways of starting OmniPage Pro®: u Open the OmniPage Pro X folder and double-click the OmniPage Pro X icon. The program launches and the OCR Toolbar will be displayed. For quicker access, place an alias program icon on your Desktop. u Drag and drop one or more image files onto the OmniPage Pro X icon. The program launches and loads the dropped image files. It does not immediately recognize them.
Chapter 1 general scanner driver types supported by the program. You can select either a Photoshop plug-in or a TWAIN driver depending on your scanner. For specific scanner types which work with a TWAIN driver, you can choose whether to use their own interface or use OmniPage Pro’s interface. For scanners using a Photoshop plug-in driver, its interface is always displayed while scanning. Each scanner driver provides a different user interface, so the available options may vary.
t To select a scanner manually: Follow instructions 1-3 listed above. Select a scanner manufacturer under Manufacturer in the Select Scanner dialog box. Select a scanner model under Scanner. Check the driver name under Driver. If you have more than one driver, select the one you want to use. Click Verify to be sure the selected scanner is correctly configured. Click OK to close the Select Scanner dialog box. Click Save in the Preferences dialog box.
Chapter 1 Decide which user interface you want to use for your scanner: the driver’s own interface or OmniPage Pro’s interface. See the overview table in the online Help topic Selecting a scanner which summarizes the user interface functioning for different scanner drivers. • Select Show TWAIN User Interface if you want to use the user interface of your scanner driver.
t To scan in the Classic Environment: • Select Scan in Classic Mode in the Select Scanner dialog box if it is not already selected. Please wait while the program compiles a scanner list. This option enables you to scan pages even if your scanner has a driver for Mac OS 9 only. If the option is selected, scanning will be performed in the Classic Environment. If the option is deselected, scanning can only be performed with a scanner driver developed for Mac OS X.
Chapter 2 Introduction You probably do business correspondence and other written projects on your computer. However, certain sources of information may not be immediately available for use. For example, if you want to incorporate part of a magazine article into a document in your word processor, you somehow have to get its text into your computer. Painstakingly retyping the article is not an appealing solution. OmniPage Pro X offers a smart solution to increase your productivity.
What is Optical Character Recognition? Optical character recognition (OCR) is the process of extracting text from images. Images can result from scanning paper documents or opening image files. Images do not have editable text characters; they have many tiny dots (pixels) that together form character shapes. These present a picture of the text on a page. During OCR, OmniPage Pro analyzes the character shapes in an image and determines character solutions to produce editable text.
Chapter 2 Basic steps in the OCR process There are three main steps in OmniPage Pro’s OCR process. They correspond to three large numbered buttons in the OCR Toolbar. Documents can be processed automatically or manually. In automatic processing, the Start button takes all specified document pages through the whole process (1-2-3) without a stop. Processing is done according to settings selected in pop-up menus on the OCR Toolbar and in the Preferences dialog box.
The OCR Toolbar The OCR Toolbar appears when you first start the program. It is the control center for all document processing. The OCR Toolbar can be minimized under Mac OS 9. Start button: Use this to start and re-start automatic processing, and to stop any processing. Get Page Primary language Original Layout display button pop-up menu OCR button Export button Assistant button: Guides you to select settings and launches automatic processing.
Chapter 2 The full OmniPage Pro interface The full OmniPage Pro X interface appears when you start a document. The main screen areas of the interface are: u u u u u The OCR Toolbar The Document window (with Image view and Text view) The Thumbnail window The Zone Info and Tools palettes The Preferences dialog box OCR Toolbar Tools palette Thumbnail window The thumbnail of the currently displayed page has a shaded background. These icons indicate page status.
The Document window The Document window allows you to view and work with pages in the current document. You can drag this window to different locations. Original page images are displayed in Image view and recognition results are displayed in Text view. A highlight-colored border denotes which view is active. Click inside a view area to activate it. Both views have scroll bars if the current page cannot be fully displayed.
Chapter 2 See Working with documents on page 55 for more information on using thumbnails for page operations. The Zone Info and Tools palettes The Zone Info and Tools palettes are displayed whenever Image view is active. You can drag them to different locations. Under Mac OS 9, they can be minimized and restored.
The Preferences dialog box This dialog box is the central location for all OmniPage Pro settings not accessible through the OCR Toolbar. To open it, choose Preferences... in the Application menu (Mac OS 9: Edit menu). The Preferences dialog box has four sections: Scanner, OCR, Spelling and Miscellaneous. Each section can be displayed by clicking its icon on the left. Click each icon to view and select different groups of settings. Guidance on selecting settings in each section is provided in chapter 4.
Chapter 3 Processing documents This chapter describes how to process documents in OmniPage Pro from start to finish. It tells you how the basic steps of OCR are linked during automatic and manual processing. It explains how you can exploit the advantages of each type of processing within a single document. The chapter also provides instructions for performing each OCR step and for other tasks you can do with your documents.
Basic processing steps The following diagram summarizes how the basic steps are linked, and directs you to a page in this Guide. This workflow is broadly valid for both automatic and manual processing. The steps performed by the three basic OCR Toolbar buttons have a darker border.
Chapter 3 To prepare for automatic processing 1. Select the source for one or more page images. Choose Load image to open one or more page images from file. Choose Scan in B&W to scan in black-and-white. Choose Scan in Gray to scan in grayscale. Choose Scan in Color to scan in color (with a color scanner). See Bringing page images into OmniPage Pro on page 36 and Get Page options on page 70 for information on these choices. 2. Select a style set.
To process a new document automatically We assume you have started OmniPage Pro X and can see the OCR Toolbar, but you have no document open and all settings are ready. 1. Click the Start button to launch automatic processing. 2. All specified pages are scanned or the Load Images dialog box lets you select image files. The status line reports progress as images are acquired. Page images appear briefly in Image view. 3. A miniature image of each page appears in Thumbnail view as it is acquired.
Chapter 3 To process an existing document automatically You can also click Start to perform automatic processing when you have a document open. It does not matter whether its pages were processed automatically or manually. To scan new pages into the document, place them in the scanner correctly. When you click Start, the OCR Instructions dialog box offers you the following choices.
Manual processing You can use manual processing when you want greater control over the OCR process. Processing proceeds step-by-step. This allows you to view and manually zone images before you send them for recognition. It also lets you modify settings between each processing step or from page to page. That can be important if some pages in the document need different settings from others. During manual processing you can acquire multiple pages with each click of the Get Page button.
Chapter 3 will be auto-zoned. You will see a progress indicator as the current page is recognized. After OCR, recognition results appear in Text view. If you requested proofing and there are suspect words on the page, proofing begins immediately. If you did not request proofing, you can view, edit and verify the recognized text or start proofing from any point in the text. See Performing OCR on page 50 and Training OCR on page 97. 4. Export the document Specify an export target in the Export pop-up menu.
5. Specify a choice in the Zoning Instructions dialog box. 6. Repeat steps 4 and 5 until all pages are adequately recognized. 7. Export the finished document as required. t To start manually and finish automatically: 1. Prepare settings and acquire all the images for the document by clicking the Get Page button. 2. Examine the images for suitable brightness, orientation and content. Rescan or rotate unsuitable images. Use the eraser tool or zoning to remove or exclude spotty and degraded areas.
Chapter 3 u OCR: A training file and options for saving graphics. Spelling: A user dictionary and Language Analyst® options. u Miscellaneous: Retain or drop table grids. u Click the OCR Assistant button to start moving through the six steps: Step 1, Acquiring images: Choose one of the scanning modes (blackand-white, grayscale or color) or to load image files. If you are scanning pages, place them in the scanner.
Bringing page images into OmniPage Pro This section describes the different methods for acquiring images: u u u u Scanning pages Loading image files Opening OmniPage Documents Using drag-and-drop Scanning pages You can scan a paper document to generate an electronic image. See Starting OmniPage Pro and Selecting your scanner in chapter 1. t To scan pages into OmniPage Pro: 1. Place a page in your scanner. You can scan a stack of pages if you have an automatic document feeder (ADF). 2.
Chapter 3 t To load a single page image file: 1. Select Load Image as the option in the Get Page Pop-up menu. 2. Click the Get Page button. The Load Images dialog box appears. It is a standard Macintosh dialog box. 3. Specify in the Show pop-up menu which files should be listed: All image files, or only files with a single format. 4. Select the folder containing your file with the From pop-up menu. 5. Select the file you want to load and then click Open. Or, doubleclick the file name.
Opening OmniPage Documents You can open an OmniPage Document using the Open command in the File menu. An OmniPage Document (OPD) is a file in OmniPage Pro’s proprietary format. OPDs contain original page images, zones, settings and recognition results (if any). Each piece of recognized text remains linked to the image it came from, so text can still be proofed and verified when the OPD is reopened.
Chapter 3 If you drag and then drop the image icon on Image view, the page or pages are appended to the end of the document. If you drop the image icon on Thumbnail view, you can choose where to have the page(s) placed. As you drag the icon over the pages, a black bar appears between two pages. Drop the icon to have the new page(s) placed immediately below the bar. The first of the imported pages becomes the current page. You can launch OmniPage Pro X and load one or more images to start a new document.
This section presents the following topics: u Creating zones automatically u Specifying zone types u Drawing zones manually u Modifying zones Creating zones automatically OmniPage Pro can create zones automatically for you. To do so, it uses the selected page layout description to find blocks of text and graphics on the page, place these in zones and decide a reading order. t To run auto-zoning during automatic processing: 1.
Chapter 3 • Use Only Current Zones (auto-zoning will not run) • Discard Current Zones and Find New Zones • Keep Current Zones and Find Additional Zones. Specifying zone types All zones are identified as a particular type. This determines the way they are treated during OCR. You can specify zone types using the tools at the top of the Zone Info palette. This palette always appears when Image view is active.
t Single Column Text zone type OmniPage Pro treats all contents as one block of text; it does not look for columns or detect graphics. Tabs are inserted between any side-byside columns detected within a zone, so this zone type can be used for tables or texts in columns you do not want decolumnized or placed in a table grid. These zones have blue borders (denoting a zone containing text). t Multiple Column Text zone type OmniPage Pro tries to find columns within the zone area.
Chapter 3 reversed in your output document, do this in your target application. These zones have black or white borders, depending on the background color. t Ignore zone type OmniPage Pro ignores the zone entirely during auto-zoning. This is useful if you want OmniPage Pro to draw zones automatically but first want to identify areas to be ignored. By excluding complex tables or areas of line-art you do not need, you can speed up processing considerably. These zones have red borders and stripes.
2. Select Alphanumeric or Numeric in the Zone Contents pop-up menu. Drawing zones manually You can draw and modify zones using tools in the Tools palette. If the Tools palette does not appear, check that Image view is active and the palette is not minimized (Mac OS 9 only). Polygon tool Draw/Select Zones tool Order Zones tool Table handling tools Image rotating tools Modify Zones tool Apply Template tool: Apply the zones from the template set in the OCR Toolbar to the current page.
Chapter 3 You can draw up to 64 separate zones. Draw zones in the order you want them processed. A number at the top left of each zone indicates the reading order. If you draw a zone over an existing one, the borders of the new zone will wrap around the existing zone. The zones will not overlap. t To draw an irregular zone: 1. Click the Polygon tool in the Tools palette. The mouse pointer becomes a drawing tool in Image view. 2. Make sure no existing zones are selected. 3.
Modifying zones Zones can be modified before OCR takes place. You can move, copy, resize, reorder, extend, connect, divide, and delete zones. If you modify zones after recognition, you will have to re-recognize the page for the modifications to take effect. The Modify Zones tool is for adding and subtracting zone areas. Typically, this results in irregular zones, so it is not available for table type zones. This tool is also for connecting and dividing zones. t To move zones: 1.
Chapter 3 4. Continue until all the zones are appropriately ordered. If you do not number all the zones, they will be automatically numbered when you select another tool or start OCR. Unless you are using the True Page style set, the order of zones determines the order in which text will be placed on a recognized page. t To add an area to a zone: 1. Click the Modify Zones tool in the Tools palette. 2.
t To connect two or more zones: 1. Click the Modify Zones tool in the Tools palette. 2. Position the mouse pointer in one of the zones you want to connect. 3. Hold the mouse button down and drag the mouse pointer onto the zone(s) you want to connect. Enclose the whole area you want included in the new connected zone. 4. Release the mouse button when you are done. The zone borders change to display the new connected zone.
Chapter 3 2. Select the zone you want to delete by clicking it. Handles appear on the selected zone. • Shift-click to select additional zones. • Double-click the Draw/Select Zones tool or choose Select All in the Edit menu to select all zones on the current page. 3. Press the Delete key or choose Clear in the Edit menu. The selected zones disappear, but the page image itself remains.
Performing recognition Performing recognition involves analyzing character shapes found in an image and generating editable text from them. This is also referred to as performing OCR. After OCR, you can proofread for recognition errors and misspelled words before you export the text to another application.
Chapter 3 Proofreading OCR results Recognized text appears in Text view after OCR so you can check for errors and misspellings in the text before exporting it. Error checking (proofing) starts automatically after OCR if you chose OCR & Proof as the OCR option. It starts from the first recognized page and continues through all recognized pages in the document. If you chose Perform OCR you must start proofing by choosing Proofread OCR... in the Edit menu as described below.
This tells why this word is offered for proofing. Click Prefs to select error checking options. This displays the word as OmniPage Pro recognized it. Its color also tells why it is displayed. Drag corner to change window size. Click in this window to enlarge the view of the original image. Option-click to reduce the view. 2. Select one of these options for the word: • Click Ignore to allow the word to remain as recognized.
Chapter 3 reached. The program informs you when the end of the document has been reached; all your changes are saved automatically. Note OmniPage Pro can only perform a spelling check on words that it has recognized. It cannot check words that you have manually typed into Text view. Tip To delete unneeded characters (for instance generated by ‘noise’ on the image), clear the edit box and click Change.
Color markers Words to be stopped on during proofing may appear in color (red, green or blue) in Text view and in the Proofread OCR dialog box. To temporarily hide color markers in recognized text, make Text view active and choose Hide Markers in the Edit menu. The coloring is removed from all marked words in the current document, and no marking is placed on new pages or documents. To show markers again, choose Show Markers in the Edit menu.
Chapter 3 Working with documents The Thumbnail window gives an overview of all pages in the document and allows you to perform page-level operations. The Document window allows you to work with each page one after the other.
Saving a document as you work If you are working with a long or important document, or want to reopen the document in OmniPage Pro in a future session, you should save it as an OmniPage Document soon after beginning your work. To save the document to disk for the first time, choose Save or Save As... in the File menu. The Save As OmniPage Document dialog box appears, allowing you to choose a location and specify the file name. The recommended extension for an OmniPage Document is .opd.
Chapter 3 Deleting a page You can delete a page from a document that has at least two pages. For example, you may want to delete a page that was poorly scanned. To delete the current page, choose Delete Current Page in the Edit menu. Or, click the thumbnail of the page you want to delete and drag it to Trash. Everything is discarded: the thumbnail, page image, and recognition results. Pages are renumbered automatically.
Erasing areas of an image You can erase areas of the actual image using the Erase Image tool in the Tools palette. This is useful if you want to get rid of smudges, signatures, or other types of “noise” on the page before OCR. 1. Use the Zoom tool in the Tools palette to enlarge the area of the image you want to erase. 2. Click the Erase Image tool in the Tools palette. The mouse pointer turns into a square box. 3. Click the box over the image area that you want to erase.
Chapter 3 Selecting a block of text Click at the start of the desired text and drag the cursor to the desired end point. Release the mouse button. The selected text is highlighted. With the True Page style set, a selection cannot extend beyond a single frame. Formatting text Use commands in the Format menu to apply font, font style, and font size formatting to selected text in your recognized document.
t To select options and print pages: 1. Choose Page Setup... in the File menu. The options available in the Page Setup dialog box depend on your printer. 2. Select the desired options and then click OK. 3. Make the view (Text or Image) from which you want to print active. 4. Choose Print Text... (or Print Images...) in the File menu. The choices in the dialog box depend on your printer. 5. Select print options for your document. Choose to print all images or a range of pages. 6.
Chapter 3 Exporting documents You can export original images or recognition results, for use in other applications by: u u u u u u Saving an OmniPage Document Saving images Saving recognition results Saving to Portable Document Format (PDF) Copying a document to the Clipboard Using drag-and-drop functionality Saving an OmniPage Document You can save your document as an OmniPage Document file if you want to reopen it in OmniPage Pro again.
Make Image view active and choose Save Images... from the File menu. The Save Images dialog box appears: Define a saving name and location Enter a saving format for the file(s). If you choose these, numerical suffixes will be appended to your file name, to generate unique file names. For information on the supported image file formats, see page 112. PDF is not offered for saving images, because it is the recognition results that are saved to PDF, not the original images. See the following two topics.
Chapter 3 Type in a name and define a location for your file. Select a save format. Select save options when saving to formats other than OmniPage Document. This appears if there are unrecognized pages. They will be skipped during export. This is available when True Page is set, for some saving formats. Select it to maintain page layout without frames, so text can flow between columns. Choose this to see your recognition results in their target application immediately after export. 3.
Saving to Portable Document Format (PDF) When saving to PDF, we recommend you choose the True Page style set, because this forms the basis for saving, whatever style set is chosen. Check that all text is visible within the frame borders. You have four choices when saving recognition results to PDF files. Image only: The PDF file is viewable only and cannot be modified in a PDF editor and text cannot be searched. Normal: The PDF file can be viewed and searched in a PDF viewer and edited in a PDF editor.
Chapter 3 only plain text is pasted. Graphics are retained if you selected Retain Graphics and the target application supports them. The graphics have the resolution chosen in the OCR panel of the Preferences dialog box. t To copy the image from a zone to Clipboard: 1. Make Image view active. 2. Click the Draw/Select Zones tool in the Tool palette. 3. Select the zone you want to copy by clicking it. 4. Choose Copy in the Edit menu. A copy of the image from the zone area is placed on the Clipboard.
Dragging from Text view You can drag a block of selected recognized text from Text view to the Desktop or another application that supports drag-and-drop functionality. Text formatting will be transferred if possible. The result appears on the Desktop as a picture clipping icon, and double-clicking on it allows you to view the text only. But if you drag the icon into a text editing application, it is inserted as editable text. An embedded graphic can be exported by drag-and-drop from Text view.
Chapter 3 Using Direct OCR You can run Direct OCR using automatic or manual processing. For automatic processing, all settings should be selected suitably in OmniPage Pro before using Direct OCR. If you are uncertain whether settings are suitable or not, or if you want to exclude parts of the pages, use manual processing instead. This allows you to check and change settings and also do manual zoning.
until the Direct OCR operation is finished. Proofing starts as soon as the last page is recognized, if OCR & Proof was selected. 5. When recognition or proofing is finished, the recognition results appear at the insertion point in the target application. t To use Direct OCR with manual processing: 1. Follow points 1 to 3 as for automatic processing. 2. The OCR Toolbar appears. Scanning starts or the Load Images dialog box lets you name image files. 3.
Chapter 4 Settings This chapter provides more detailed information on the options available in the pop-up menus on the OCR Toolbar and settings you can select in the Preferences dialog box. Make sure that settings are appropriate for your document before you start processing it. You may have to experiment with different settings to get the results you want.
OCR Toolbar options The three numbered OCR Toolbar buttons allow you to take a document through each step of the OCR process. The Start button begins automatic processing. You can select options in the five pop-up menus as described below.
Chapter 4 Scan in Gray Select this to scan paper documents from your scanner with grayscale scanning. Choose this if you wish to retain pictures or photos in your output document. For best OCR accuracy, choose this for lower quality pages, for example with low or varying contrast, or with text on shaded or colored backgrounds. Scan in Color Select this to scan paper documents from your scanner in color. Choose this only if you wish to retain color graphics in your recognized document.
Original Layout options You can select from the following options in the Original Layout popup menu. These let you describe the incoming pages, to assist the program in auto-zoning. Auto-zoning always runs when you perform automatic processing (unless you load a zone template), and sometimes runs during manual processing. Single Column Select this to have OmniPage Pro automatically draw and order zones on single-column page images, such as letters, memos or book pages.
Chapter 4 [Zone Templates] Select the name of a zone template file that you want to use to place zones on new incoming pages. Any zone templates you have created appear at the bottom of the pop-up menu. The example comes from a user who has created two templates to process standardized form-like printed reports – one type arrives each week, the other each month. To place template zones on an existing page, select the template here, then click the Apply Template tool in the Tools palette.
Similar Formats Select this to have results similar to Similar Fonts, but with column widths maintained when multi-column pages are decolumnized. True Page Select this to have the original page layout maintained as closely as possible. Text blocks, headings, tables, graphics and other elements are placed in frames. This is recommended when exporting to PDF format (see page 64). It is suitable only for saving formats marked Tp in the Export dialog box. Article This is an editable sample style set.
Chapter 4 OCR options You can select the following OCR options in the OCR pop-up menu. The selected option is activated during manual processing by clicking the OCR button. This performs recognition or training on the current page only. The option is also activated during automatic processing, in which case it may be applied to a series of pages. Perform OCR Select Perform OCR to recognize text on pages. During OCR, OmniPage Pro analyzes the image and interprets character shapes to produce editable text.
For more information, see Saving a document as you work on page 56, Exporting documents (page 61) and Supported file types in online Help. To Clipboard Select To Clipboard to place a copy of a document’s recognition results (text and embedded graphics) on the Clipboard. See Copying a document to the Clipboard on page 64. To Application This option cannot be selected. It appears when Direct OCR is in use. Other export options are not available at that time.
Chapter 4 Click this to open the Scanner panel. Click this to select an installed scanner, set its parameters and test it. To manually adjust the brightness, drag the slider to left or right. This becomes available as soon as you change a setting. It saves all changes made in all panels. Click this to close the dialog box and drop all changes made in any of the panels. Scanner This displays the currently selected scanner. Click Select... to select a different scanner.
• Select Flipscape to have landscape images rotated by 180 degrees. Tip Flipped and Flipscape options are useful if you are scanning pages in a book and have trouble positioning the book correctly in the scanner. You can also rotate a page image after it is loaded into OmniPage Pro. For more information, see Rotating an image on page 57. ADF settings If you use a scanner with an automatic document feeder (ADF), you can use the following settings.
Chapter 4 Brightness The brightness setting for scanning a page works like that on a photocopier. This setting can compensate for variations in paper and print quality, so it can have a big influence on OCR accuracy. Click the Manual Brightness check box and move the slider to lighten or darken the brightness for your scanning. The following illustrates optimum and unsuitable brightness.
OCR settings Click the OCR icon in the Preferences dialog box to select accuracy and output options. Use this to decide which character will replace unrecognizable characters in the output. Click this to see the OCR panel Character Type Select a setting to characterize the printed text on your pages in the Character Type pop-up menu. • Select Normal for conventionally printed text characters. Select it also for dot-matrix texts printed in fine mode or with 24-pins.
Chapter 4 Training files are useful for recognizing characters that prove difficult to recognize or are being regularly misrecognized. To create a training file, see Training OCR on page 97. Retain Graphics switch Select Retain Graphics if you want OmniPage Pro to retain original graphics, such as photographs or drawings, in the recognized document. They will be displayed in Text view and exported to file, provided the selected file format supports graphics.
The settings have no effect on recognition accuracy, nor on the display of the embedded images in Text view. They are not used when saving to OmniPage Documents, nor when saving page images, nor when exporting single graphics zones or areas by drag-and-drop or through the Clipboard. The 150 dpi setting yields higher quality pictures, but consumes more disk space when the file is saved. You can use the 75 dpi setting to save disk space, with a corresponding loss of image quality.
Chapter 4 Main Language The Main Language pop-up menu enables you to choose the main language for the page(s) you intend to recognize. Your choice determines which characters are validated for recognition and which main dictionary will be used. The languages available are Danish, Dutch, English (UK and US), Finnish, French, German, Italian, Norwegian, Portuguese (Standard and Brazilian), Spanish and Swedish.
Note It is possible to read more languages than those offered as main and secondary languages, providing you disable the Language Analyst and make a suitable language selection. See Supported languages on page 110 for advice. User Dictionary Select a user (personal) dictionary in the User Dictionary pop-up menu. For information on creating and editing user dictionaries, see User dictionaries on page 101.
Chapter 4 Miscellaneous settings Click the Miscellaneous icon on the left of the Preferences dialog box to select options for table handling, scripting and the Direct OCR feature. Click this to see the Miscellaneous panel Tables Select Retain Table Grids to have gridded tables in the original document placed in grids in Text view after they are recognized. They will also be exported in grids if the target application supports grids.
Direct OCR settings should be selected before you use the Direct OCR feature because they influence what happens as soon as you use it. • Select Begin Processing Automatically on Launch if you want OmniPage Pro to trigger the Start button as soon as you activate Direct OCR. Text will be recognized automatically: images will be scanned or loaded, auto-zoned, recognized and (if requested) presented for proofing. Recognition results will be placed at the insertion point in the target application.
Chapter 5 Customizing OCR OmniPage Pro X has many features that allow you to customize the way your documents are handled during OCR and how they appear after recognition. This chapter describes how to use these facilities.
The following tables give an overview of the built-in style sets and the zone styles offered by each of them. Four of these style sets define basic formatting levels. These cannot be deleted and allow only limited editing. They are useful mainly for processing documents automatically or for applying standard formatting during manual processing. The remaining three built-in style sets can be considered samples. They can be edited and deleted.
Chapter 5 All four styles can transmit graphics. For the first three, the graphics are placed at the end of the recognized text. In True Page the graphic is placed in a frame in its location on the original page. All four styles can accept tables. For the first three, tables are placed at their locations in the decolumnized text. In True Page the table is placed in a frame at its location on the original page. Tables appear either in grids or tabbed columns.
Specifying a global style set Select a style set from the Style Set pop-up menu in the OCR Toolbar. The selected style set is applied to all incoming pages until you change the setting. A new setting here has no effect on existing pages, even if you re-recognize them. t To modify the style set for a page: Make Image view active. The Zone Info palette appears. Select the desired style set in its Style Set for Page pop-up menu. The zone styles available for the page may change.
Chapter 5 t To create a style set: Choose Style Sets... in the Edit menu. A dialog box appears displaying all available style sets. Click New. The New Style Set dialog box appears. Enter a name for your style set. For example, you could enter Bibliography as the name if you are creating a style set for handling bibliographies. Click New. The Edit Style Set dialog box appears. Your new style set will inherit its behavior from the style set Similar Formats.
t To apply styles to existing zones: Make Image view active. The Zone Info palette appears. Check that the style set for the page is suitable. Change it if desired. Click the Draw/Select Zones tool in the Tools palette if it is not already selected. Select the zone you want to specify by clicking it. • Shift-click to select additional zones. • Double-click the Draw/Select Zones tool or choose Select All in the Edit menu to select all zones on the current page.
Chapter 5 The Edit Style Set dialog box lists the zone styles in the set. Click to make font mapping selections for the entire style set. The currently selected zone style Settings for the currently selected zone style Drag the markers in this ruler to change text start, end and indent values. Specimen text for the current zone style Click the name of the zone style you want to edit. The formatting attributes for the selected zone style are displayed.
The last three settings define the left and right limits of the text area and first-line indenting. Choose Auto to let OmniPage Pro decide the values. Enter numerical values or drag the markers in the ruler to change settings. The panel below the ruler displays the effects of your settings. Repeat the above steps to edit other zone styles. Click Delete Style to delete a selected zone style from the style set.
Chapter 5 u u t Monospaced Serif Character width is the same for each character; short lines finish off the letter strokes. The default font is Courier. Monospaced Sans-Serif Character width is the same for each character; letter strokes do not have finishing lines. The default font is 0RQDFR. Note Font mapping is not applicable to the Plain Format style set. It is always performed with the style sets Similar Fonts, Similar Formats or True Page.
Zone templates You can use a zone template to quickly and efficiently create zones on documents that have the same zoning requirements. For example, if you frequently process documents with layouts and content that require the same type of zoning, you can create and save a zone template and apply it to all such pages or documents. A zone template can have up to 64 zones. It remembers the size, position, order, type, style and contents of zones.
Chapter 5 t To remove a zone template: • Select a non-template setting in the Original Layout pop-up menu on the OCR Toolbar. OmniPage Pro will no longer place template zones on incoming page images. This does not remove template zones from existing zoned pages. Just delete or modify them or choose Discard Current Zones and Find New Zones in the Zoning Instructions dialog box. Training OCR You can create a training file to handle characters that are being consistently misrecognized.
Click the OCR button. OmniPage Pro analyzes the page and opens the Training File dialog box. Original character images are displayed along with OmniPage Pro’s interpretation of each character. Characters appear in the alphabetical order of their interpretations. Original image OmniPage Pro’s interpretation Most characters do not need to be trained. Look for uncommon and run-together characters. Look for characters whose interpretation is incorrect.
Chapter 5 Code edit box, or click a non-keyboard character in the scrolling display to add it to the edit box. In our example, the ‘H’ has been cleared and ‘//’ entered. Click OK to accept the character specification. The Training File dialog box reappears. Repeat steps 5–7 to continue specifying characters. The Delete button is not needed when you create a new training file. Any untouched character is excluded from the training file. Click Save...
t To edit a training file: Choose Training Files... in the Edit menu. The Training Files dialog box lists all training files in the Training Files folder. Double-click the training file you want to edit, or select it and click Open. The Training File dialog box displays the characters in the training file you specified. Double-click a character you want to edit. The Specify Character dialog box appears.
Chapter 5 User dictionaries Dictionaries are used to assist recognition and provide suggestions during proofing. A user dictionary is a personal dictionary that you build and customize, to supplement a built-in main dictionary. Entries for a user dictionary must consist of 2 to 32 characters, without spaces or control characters, such as tabs. The program is supplied with one empty user dictionary, named User Dictionary. t To create or edit a user dictionary: Choose User Dictionaries...
Optionally, click Export... to save your user dictionary as a plain text file, for protection or use outside the program. Click Done to save the changed state of your user dictionary within the program and exit. User dictionaries are saved in the User Dictionaries folder within your installation folder. Select one for use in the Spelling panel of the Preferences dialog box. Select None to unload a user dictionary. Words can also be added to the loaded user dictionary during proofing (see page 51).
Chapter 6 Technical information This chapter provides troubleshooting and other technical information to help you use OmniPage Pro X. Please also consult the PDF Readme file and other online help topics, or visit the Support section in the ScanSoft web pages. This answers Frequently Asked Questions (FAQ) and provides other useful guidance. The web site includes a Scanner Guide with regularly updated information about supported scanners.
Troubleshooting Solutions to try first Try these solutions if you experience problems starting the program: u Ensure that your system meets all requirements listed under System requirements in chapter 1. u Make sure that your scanner is plugged in and that all cable connections are secure. u Turn off your computer and your scanner, turn your scanner back on, and then restart your computer. Make sure other applications are functioning properly.
Chapter 6 u t Do not scan in color unless you need colored graphics in your output files. Prefer Web color or 256 colors (8-bit pixel depth) rather than True color (16-bit depth) or similar choices. To adjust preferred memory size for an application under OS 9.X: Make sure OmniPage Pro X is closed. Select OmniPage Pro X under Components in the program folder. Select Get Info then Memory from the File menu of the Finder. Adjust Preferred Size under Memory Requirements.
u With low-quality originals, sometimes a good-quality photocopy can yield better OCR results. This may be true for documents with low contrast or printed on thin paper. On the other hand, poor-quality photocopies with stripes, blotches or uneven brightness will usually give worse results. u Page images should be free of notes, lines, doodles or spots. Anything in a text zone that is not a printed character slows recognition.
Chapter 6 accuracy. The program will not open image files with resolutions below 200 dpi. If this happens and you have the documents on paper, scan them again with better settings. Ensure zones are suitable u Look at the original page images and ensure that all required text areas are enclosed by text zones. If an area is not enclosed by a zone, it is generally ignored during OCR. u Make sure zone borders do not cut through text and the graphics are correctly zoned. Resize zones as necessary.
u If you are getting poor results with a training file loaded, check its contents by clicking Training Files... from the Edit menu. Make sure the training file is appropriate for the current document. If it is not, either unload it or edit its contents to remove training from poorly formed character shapes. Unsuitable training can yield worse results than no training at all. u If proofing is skipping too many unsuitable words, be sure Use Language Analyst is enabled.
Chapter 6 Interface problems and solutions The Start button is disabled. Be sure Train OCR is not selected in the OCR pop-up menu. Training can only be done on a single page at a time. The Save button in the Preferences dialog box is grayed. Change a setting in one of the panels, then it will become available. The Verify window refuses to appear. Keep this window open or close it; do not minimize it. If it remains minimized, it cannot jump to a new location. Image view has disappeared completely.
Supported languages The program supports thirteen languages with a main dictionary and Language Analyst. The program can recognize other languages, but without these facilities. To read text in these languages, select the language(s) indicated and deselect Use Language Analyst in the Preferences dialog box. Proofing suggestions will not be available, but in most cases recognition accuracy should remain acceptable.
Chapter 6 The accented letters used in less spoken languages may vary with dialects, variants, changes over time and transcription norms. Therefore, this table can serve only as a general guide. Supported saving formats Recognition results can be saved to a wide range of target applications and saving formats.
Supported image file formats Page images can be acquired from image files. Scanned images can be saved to file: current page only, all document pages (one file per page or one multipage file), or each graphic zone on a page to a separate file. The following table details the program’s image file support.
I N D E X A Abbreviations, ignoring, 84 Accuracy best resolution for, 78 brightness options for, 79 improving, 105 Acquiring images, 21, 29, 32, 36 Acronyms, ignoring, 84 Adding areas to zones, 47 new styles to a style set, 94 pages to a document, 31, 38 trained characters to training files, 99 words to a user dictionary, 52 ADF (automatic document feeder) settings, 78 when to use, 36 Alphanumeric zone, 44 Applying zone styles, 92 shortcut for, 92 Article style set, 74 ASCII text output, 111 Auto Detect z
user dictionaries, 101 zones styles, 93 English texts read aloud, 60 Erasing image areas, 58 Export To Application, 66, 76 To Clipboard, 76 To File, 75 Export button, 22, 32, 33, 75 Exporting documents copying to the Clipboard, 64 saving recognition results, 62 F Fax recognition, 108 File types, supported, 111 Finding suspect words, 51 Font attributes, 93 Font formatting, 59 Font mapping, 93, 94 Font size, changing, 59 Formatting text, 59 Frames, supported, 74 G Get Page button, 22, 32, 70 Getting online
Opening OmniPage Documents, 38 Optical character recognition see OCR Optimizing image quality, 79 Ordering zones, 46 Orientation rotating an image manually, 57 selecting for scanning, 77 P Pages adding to a document, 38 deleting current, 57 going to, 56 loading images files, 36 processing all unrecognized, 31 reordering, 56 reprocessing, 31 re-recognizing, 46 resizing view of, 55 rotating in Image view, 57 scanning, 36 size and orientation, 77 Paragraph attributes, 93 PDF input, 36, 112 PDF output, 64, 111
deleting, 91 editing, 92 selecting, 90, 91 Style sets, built-in Article, 74, 89 Contemporary Memo, 74, 89 Plain Format, 73, 88 Similar Fonts, 73, 88 Similar Formats, 74, 88 True Page, 64, 74, 88 Typewriter Memo, 74, 89 Subtracting from zones, 47 Suggestion from dictionaries for proofing, 84 Supported file formats, 111 Suspect words, 51, 54 System requirements, 12 T Table dividers, 49 Table zone type, 42, 45, 49 Tables column dividers in, 49 retain grids, 85 row dividers in, 49 Technical information, 103 Te