
9.0
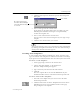

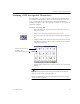
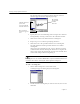
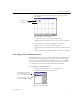
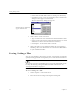
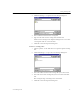
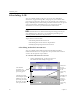
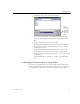
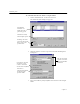
Table Of Contents
- Welcome
- Installation and Setup
- Introduction to OmniPage Pro
- Processing Documents
- OmniPage Pro Settings
- Customizing OCR
- Technical Information
- General Troubleshooting Solutions
- Supported File-Format Types
- Scanner Setup Issues
- Scanner Drivers Supplied by the Manufacturer
- Scanner Drivers Supplied by Caere
- Scan Manager is Needed with OmniPage Pro
- Problems Connecting OmniPage Pro to Your Scanner
- Missing Scan Image Command
- Scanner Message on Launch
- System Crash Occurs While Scanning
- Scanner Not Listed in Supported Scanners List Box
- Scanning Tips
- OCR Problems
- Uninstalling the Software

Scheduling OCR
Customizing OCR 81
2 Click
Add...
to open the Add Jobs dialog box.
3 Locate and select the files you want to add to the schedule.
You can select OmniPage Documents and supported image
files.
4 Click
Open
after selecting the desired files.
The Schedule OCR dialog box displays the newly added files.
5 Select the time that you want OmniPage Pro to process the
scheduled documents.
Select
Finish now
if you want OmniPage Pro to process all
scheduled documents as soon as you close the dialog box.
6 Click
OK
in the Schedule OCR dialog box to save your settings
as specified.
All scheduled files are processed, in order, at the scheduled
time.
Scheduling Documents from an Input Folder
You can set up OmniPage Pro to automatically schedule documents
from a specified input folder. Scheduled documents are recognized at
the specified time and then saved in the designated output folder.
Click
Advanced
to select
documents
from more
than one
folder.