
9.0
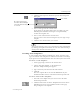

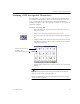
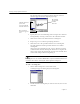
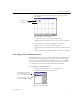
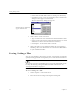
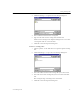
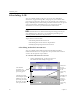
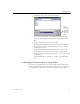
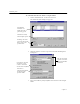
Table Of Contents
- Welcome
- Installation and Setup
- Introduction to OmniPage Pro
- Processing Documents
- OmniPage Pro Settings
- Customizing OCR
- Technical Information
- General Troubleshooting Solutions
- Supported File-Format Types
- Scanner Setup Issues
- Scanner Drivers Supplied by the Manufacturer
- Scanner Drivers Supplied by Caere
- Scan Manager is Needed with OmniPage Pro
- Problems Connecting OmniPage Pro to Your Scanner
- Missing Scan Image Command
- Scanner Message on Launch
- System Crash Occurs While Scanning
- Scanner Not Listed in Supported Scanners List Box
- Scanning Tips
- OCR Problems
- Uninstalling the Software

Customizing Zones
Customizing OCR 73
2 Click the Zone Properties button to open the Zone Properties
dialog box.
3 Select a zone type for the selected zones.
If you change an irregular-shaped zone to a Table type zone,
OmniPage Pro substitutes the largest rectangle that fully
encloses the irregular area.
4 Select a zone content for the selected zones.
You can select a zone-content setting for any zone type except
Graphic.
5 Click the Close button when you are done.
You can also change a zone’s type and content settings individually
by clicking your right-mouse button over the zone and choosing a
setting in the shortcut menu that appears.
Creating Zone Templates
A zone template has attributes including size, shape, position, order,
type, and content. Zone templates are useful to create zones on an image
if you process a lot of documents that have the same layout and content.
To create a zone template:
1 Load a page image and create the desired zones.
2 Choose
Save Zone Template
... in the Tools menu.
The New Template dialog box appears.
3 Type a name for your file in the
File name
text box.
4 Click
OK
.
The zone template file is saved in the data folder in your
installation folder. Select it in the Zone button drop-down list.
To create zones with a template:
1 Select the zone template that you want to use in the Zone
button drop-down list.
2 Click the Zone button or choose
Te mp l a te
in the Process menu.
OmniPage Pro creates your predefined zones on the page
image using the zone template.
Close button
The settings in this dialog
box will be blank if multiple
zones with different settings
are selected.