
9.0
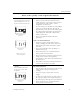

Table Of Contents
- Welcome
- Installation and Setup
- Introduction to OmniPage Pro
- Processing Documents
- OmniPage Pro Settings
- Customizing OCR
- Technical Information
- General Troubleshooting Solutions
- Supported File-Format Types
- Scanner Setup Issues
- Scanner Drivers Supplied by the Manufacturer
- Scanner Drivers Supplied by Caere
- Scan Manager is Needed with OmniPage Pro
- Problems Connecting OmniPage Pro to Your Scanner
- Missing Scan Image Command
- Scanner Message on Launch
- System Crash Occurs While Scanning
- Scanner Not Listed in Supported Scanners List Box
- Scanning Tips
- OCR Problems
- Uninstalling the Software

Adjusting Page Images Before OCR
62 Chapter 5
Adjusting Page Images Before OCR
You can rotate and straighten page images in OmniPage Pro’s image
viewer before zoning and OCR take place. This is recommended to
improve OCR accuracy on pages that are not oriented correctly.
If you need to rotate or straighten a page, be sure to do so
before
you
create zones because all zones are deleted during these operations.
To rotate a page image:
1 Click on the page image to make the image viewer active.
2 Click the Rotate Image button to rotate the image 90-degrees
(clockwise) at a time.
Or, choose
Rotate
in the View menu and select 90, 180, or 270
degrees.
To straighten a page image:
1 Click on the page image to make the image viewer active.
2 Click the Straighten Image button.
Or, choose
Straighten Image
in the View menu.
OmniPage Pro straightens the page image up to a maximum of
10 degrees. OmniPage Pro will not straighten a page if it
determines that it is unnecessary.
It is recommended that you have OmniPage Pro automatically
rotate or straighten pages if needed during OCR by simply selecting
the
Automatically straighten page image
and
Automatically correct page
orientation
options in the
Accuracy
tab of the Options dialog box.