
9.0
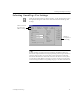
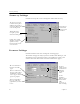
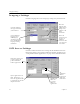
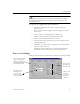
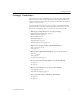
Table Of Contents
- Welcome
- Installation and Setup
- Introduction to OmniPage Pro
- Processing Documents
- OmniPage Pro Settings
- Customizing OCR
- Technical Information
- General Troubleshooting Solutions
- Supported File-Format Types
- Scanner Setup Issues
- Scanner Drivers Supplied by the Manufacturer
- Scanner Drivers Supplied by Caere
- Scan Manager is Needed with OmniPage Pro
- Problems Connecting OmniPage Pro to Your Scanner
- Missing Scan Image Command
- Scanner Message on Launch
- System Crash Occurs While Scanning
- Scanner Not Listed in Supported Scanners List Box
- Scanning Tips
- OCR Problems
- Uninstalling the Software

Selecting OmniPage Pro Settings
OmniPage Pro Settings 45
Selecting OmniPage Pro Settings
Click the Options button or choose
Options...
in the Tools menu to open
the Options dialog box. This is the central location for OmniPage Pro
settings.
Default settings are shown in most examples that follow. However,
documents require different settings depending on their input attributes
and your output goals. To get the best results, learn how to identify
document characteristics and make selections for them. You may have
to experiment with different settings to get the results you want. Refer
to the “Settings Guidelines” beginning on page 51 for more information.
Click each tab to
view and select
different settings.
Click for a
description of
each setting.