
9.0

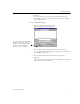


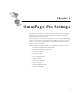
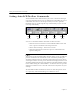
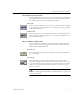
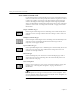
Table Of Contents
- Welcome
- Installation and Setup
- Introduction to OmniPage Pro
- Processing Documents
- OmniPage Pro Settings
- Customizing OCR
- Technical Information
- General Troubleshooting Solutions
- Supported File-Format Types
- Scanner Setup Issues
- Scanner Drivers Supplied by the Manufacturer
- Scanner Drivers Supplied by Caere
- Scan Manager is Needed with OmniPage Pro
- Problems Connecting OmniPage Pro to Your Scanner
- Missing Scan Image Command
- Scanner Message on Launch
- System Crash Occurs While Scanning
- Scanner Not Listed in Supported Scanners List Box
- Scanning Tips
- OCR Problems
- Uninstalling the Software

Setting AutoOCR Toolbar Commands
40 Chapter 4
Setting AutoOCR Toolbar Commands
The AutoOCR toolbar buttons allow you to take a document through
each step of the OCR process. Every toolbar button has different process
commands that can be set for the operations you want to perform.
OmniPage Pro can go through all steps automatically, or you can start
each step individually.
You can set AutoOCR toolbar commands in three locations:
• Click the down arrow below each AutoOCR toolbar button and
select a process command in the drop-down list.
• Choose
Process Settings...
in the Process menu.
• Click the Options button and select process commands in the
Options dialog box.
The pictures in the AutoOCR toolbar buttons change as you set different
process commands. The commands can be activated by clicking the
AutoOCR toolbar buttons or choosing commands in the Process menu.
A description of the selected process command is displayed below each
AutoOCR toolbar button when
Large
Buttons
is checked (default setting)
in the
Toolbars dialog box. Choose Toolbars... in the
View menu to open the
dialog box. Toolbars can be “torn off” and relocated anywhere on your
desktop.
All AutoOCR toolbar commands are shown in their drop-down states
on a separately enclosed OmniPage Pro 9 Reference card.
OCR
button
Zone
button
Image
button
AUTO
button
Export
button