
9.0
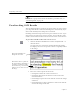
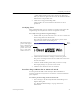
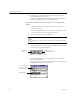
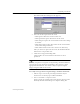
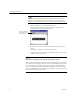
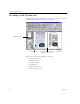
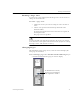
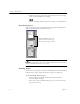
Table Of Contents
- Welcome
- Installation and Setup
- Introduction to OmniPage Pro
- Processing Documents
- OmniPage Pro Settings
- Customizing OCR
- Technical Information
- General Troubleshooting Solutions
- Supported File-Format Types
- Scanner Setup Issues
- Scanner Drivers Supplied by the Manufacturer
- Scanner Drivers Supplied by Caere
- Scan Manager is Needed with OmniPage Pro
- Problems Connecting OmniPage Pro to Your Scanner
- Missing Scan Image Command
- Scanner Message on Launch
- System Crash Occurs While Scanning
- Scanner Not Listed in Supported Scanners List Box
- Scanning Tips
- OCR Problems
- Uninstalling the Software

Proofreading OCR Results
26 Chapter 3
2 Make sure the *.doc file extension is associated with the
version of Word you plan to use.
Refer to your Windows documentation for more information
on associating file extensions with applications.
To proofread OCR results and correct errors in Microsoft
Word:
1 Perform OCR on your document and then save it as the
appropriate file type:
• Save as
Word for Windows 7.0, 95
if you are using that version.
• Save as
Word 97
if you are using that version.
2 Open the document in Microsoft Word.
The document must be opened on a system that has OmniPage Pro
installed.
An OmniPage menu appears in Microsoft Word’s menu bar as
well as this corresponding toolbar:
3 Choose
Proofread OCR...
in the OmniPage menu or click the
Proofread OCR button.
If a suspected error is detected, the Verify Text window appears
displaying the original image of the text.
Proofread
OCR
Remove OCR
Proofreader Support
Verify Text
Close Image Viewer
Use these buttons
to zoom in or out
on the image.
original image