
9.0
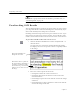
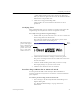
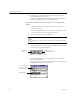
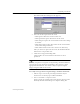
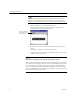
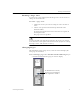
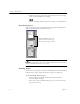
Table Of Contents
- Welcome
- Installation and Setup
- Introduction to OmniPage Pro
- Processing Documents
- OmniPage Pro Settings
- Customizing OCR
- Technical Information
- General Troubleshooting Solutions
- Supported File-Format Types
- Scanner Setup Issues
- Scanner Drivers Supplied by the Manufacturer
- Scanner Drivers Supplied by Caere
- Scan Manager is Needed with OmniPage Pro
- Problems Connecting OmniPage Pro to Your Scanner
- Missing Scan Image Command
- Scanner Message on Launch
- System Crash Occurs While Scanning
- Scanner Not Listed in Supported Scanners List Box
- Scanning Tips
- OCR Problems
- Uninstalling the Software

Performing OCR on a Document
Processing Documents 23
2 Click the Zone button or choose
Auto Zones
in the Process
menu.
OmniPage Pro automatically draws zones on the current page
in the image viewer. Each zone has a number indicating its
order and a picture indicating its zone type.
Make sure zones are identified correctly before performing OCR. For
example, if you want to retain an area as a graphic, that area should be
identified as a
Graphic
zone type. See “Changing Zone Properties” on
page 71 for more information.
Performing OCR on a Document
Performing OCR converts an image to editable text. This is also referred
to as
recognizing text
.
OmniPage Pro only recognizes machine-printed characters such as
laser-printed or typewritten text. However, it can retain handwritten
text, such as a signature, as a graphic.
To perform OCR:
1 Choose
Options...
in the Tools menu and click the
Page Format
tab.
2 Select an
Output Format
setting for your document.
OmniPage Pro uses this setting to determine the output
formatting of a document during OCR.
3Set
OCR and Proof
as the command in the OCR button’s drop-
down list.
Or, set
Perform OCR
as the command if you do not want the
OCR Proofreader to begin automatically after OCR.
4 Click the OCR button.
The page is recognized according to the current zones and
settings. If there are no zones on the page, zones are created
according to the current command in the Zone button.