
9.0
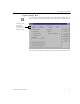

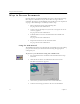
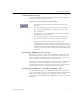
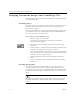

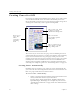
Table Of Contents
- Welcome
- Installation and Setup
- Introduction to OmniPage Pro
- Processing Documents
- OmniPage Pro Settings
- Customizing OCR
- Technical Information
- General Troubleshooting Solutions
- Supported File-Format Types
- Scanner Setup Issues
- Scanner Drivers Supplied by the Manufacturer
- Scanner Drivers Supplied by Caere
- Scan Manager is Needed with OmniPage Pro
- Problems Connecting OmniPage Pro to Your Scanner
- Missing Scan Image Command
- Scanner Message on Launch
- System Crash Occurs While Scanning
- Scanner Not Listed in Supported Scanners List Box
- Scanning Tips
- OCR Problems
- Uninstalling the Software

Bringing Document Images into OmniPage Pro
Processing Documents 21
To load image files into OmniPage Pro:
1Set
Load Image
as the command in the Image button’s drop-
down list.
2 Click the Image button or choose
Load Image
in the Process
menu.
The Load Image dialog box appears.
3 Select the folder location and file type of the file you want to
load.
See “Supported File-Format Types” on page 89 for a complete
list of supported file formats.
4 Select the files you want to load.
You can Shift-click or Ctrl-click to select multiple files in the
same folder.
5 Click
Advanced
if you want to select files from more than one
folder
.
• Select a file and click
Add
to put it in the
Selected Files
list.
•Click
Add All
to add all files from the current folder.
6 Click
Open
when you have selected all the files you want to
load.
Image files are loaded in the order selected and combined into
one working document.
If you have electronic fax files that you want to convert to editable text,
save the fax files in TIFF format and load them into OmniPage Pro using
the
Load Image
command.
Click Advanced if
you want to select
files from more
than one folder.