
8.0
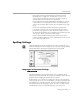
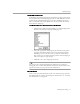
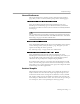


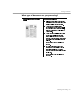
Table Of Contents
- Introduction to OmniPage Pro
- Installation and Setup
- Processing Documents
- OmniPage Pro Settings
- Customizing OCR
- Technical Information
- Glossary Terms

Direct Input Settings
OmniPage Pro Settings - 71
• Make sure
Save Page Image in OmniPage Document
and the desired
resolution are selected in the
Document
section of the Settings
Panel.
• Make sure that graphics on a page image are identified as
Graphic
zone types. These have green borders and display a graphic icon.
See “Specifying Zone Types” on page 31 for more information.
For additional guidelines, see “Do you want to retain graphics in your
document?” on page 89.
Reject Character
Unrecognizable characters are represented by a red reject character
when recognized text is displayed in the Text View. Type the character
you want to use in the
Reject Character
edit box. The default character is
a tilde (~).
For example, if OmniPage Pro could not recognize the J in REJECT, and
the tilde (~) was the reject character, the string RE~ECT would appear
in your recognized document.
Direct Input Settings
Click the
Direct Input
icon in the Settings Panel to select options for the
Direct Input feature.
Direct Input allows you to initiate OCR from the Apple menu and paste
recognized text directly into another open application. See “Direct
Input: Pasting Text into Other Applications” on page 46 for more
information.
Direct Input settings should be selected
before
you use the Direct Input
feature because they influence what happens as soon as you use it.