
8.0
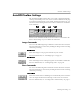
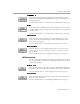
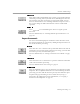
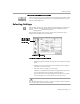
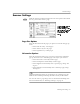

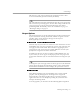
Table Of Contents
- Introduction to OmniPage Pro
- Installation and Setup
- Processing Documents
- OmniPage Pro Settings
- Customizing OCR
- Technical Information
- Glossary Terms

AutoOCR Toolbar Settings
OmniPage Pro Settings - 62
AutoOCR Toolbar Settings
The AutoOCR Toolbar buttons allow you to take a document through
each step of the OCR process. You can set various commands in the pop-
up menus beneath the Image, Zone, OCR, and Export buttons. Or, you
can choose
Process Settings
in the Process menu and choose commands
in the submenu.
Pictures in the AutoOCR Toolbar buttons and menu commands in the
Process menu change as you set different commands.
Image Commands
You can set the following Image commands. Unless otherwise noted, the
selected commands are activated by clicking the Image button or during
automatic processing.
Scan Image
Select
Scan Image
to scan paper documents in your scanner.
For more information, see “Scanning Pages” on page 27.
Load Image
Select
Load Image
to load existing image files such as TIFF or PICT files.
For more information, see “Loading Image Files” on page 28.
Zone Commands
You can set the following Zone commands. Unless otherwise noted, the
selected commands are activated by clicking the Zone button or during
automatic processing.
One Column
Select
One Column
to have OmniPage Pro automatically draw and order
zones on single-column document images such as letters or memos.
For more information, see “Creating Zones Automatically” on page 31.
Image
button
Zone
button
OCR
button
Export
button