
8.0
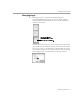
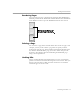
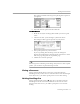

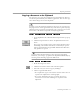
Table Of Contents
- Introduction to OmniPage Pro
- Installation and Setup
- Processing Documents
- OmniPage Pro Settings
- Customizing OCR
- Technical Information
- Glossary Terms

Working With Documents
Processing Documents - 54
If you do not want to permanently erase parts of the actual image, but
want to omit areas of a page during OCR, identify the areas as
Ignore
zone types or do not include them in any zones at all.
Inverting an Image
OmniPage Pro cannot perform OCR properly on white text on a black
background. To remedy this, you can invert an image (reverse the black
and white elements) before OCR. However, if you invert an image with
a color depth of 256 colors (8-bit), you can not re-invert it. Additionally,
inverted color images appear unsatisfying.
To invert the contents of a zone:
1 Click the Draw/Select Zones tool in the Tool palette if it is not
already selected.
2 Select the zone you want to invert by clicking it.
3 Choose
Invert Selection
in the Edit menu.
The black and white elements within the selected zone are
reversed.
To invert an entire image:
1 Make the Image View active, but
do not
select any zones.
2 Choose
Invert
in the Edit menu.
The black and white elements in the entire image are reversed.
Straightening an Image
OmniPage Pro cannot perform OCR properly if the scanned text of the
image is not aligned horizontally. The Straighten button can be used to
correct minor misalignment of the scanned image.
To straighten the image:
1 Click the Straighten button in the Tool palette.
The scanned image is straightened and any color or grayscale
information is maintained.
Modifying Text
You can modify recognized text in the Text View before exporting it to
another application. Choose
Text View
in the Window menu (or
a
j) to
display the Text View and make it active
See also “Proofreading OCR Results” on page 38.