
8.0
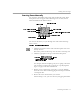
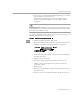
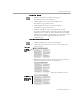

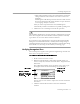
Table Of Contents
- Introduction to OmniPage Pro
- Installation and Setup
- Processing Documents
- OmniPage Pro Settings
- Customizing OCR
- Technical Information
- Glossary Terms

Creating Zones on a Page
Processing Documents - 32
from the top of the first column, going down the column, and then back
up to the next column).
Automatic
zones have purple borders.
Text
zone type:
OmniPage Pro treats all contents as one block of text; it does not detect
graphics. Tabs are inserted between any side-by-side columns detected
within a zone, so this zone type is recommended only for zones that
contain tables or single columns of text.
Text
zones have blue borders.
Graphic
zone type:
OmniPage Pro treats all contents as a graphic area; it does not attempt to
convert the zone to text.
Graphic
zones have green borders and display a
graphic icon.
Ignore
zone type:
OmniPage Pro ignores the zone entirely. This is useful if you want
OmniPage Pro to draw zones automatically but first want to identify
areas to ignore.
Ignore
zones have red borders and stripes.
You can change the zone type of individual zones any time before OCR.
For example, suppose zones are created automatically on a page and the
results include a
Text
zone which contains two columns of text. If you do
not want tabs inserted between the two columns, you can reidentify the
zone type as
Automatic.
The columns will be recognized as flowing text.
To specify a zone type:
1 Click the Draw/Select Zones tool in the Tool palette if it is not
already selected.
If the Tool palette is closed when the Image View is active,
choose
Show Tool Palette
from the Window menu.
2 Select the zone you want to identify by clicking it.
• Shift-click to select additional zones.
• Double-click the Draw/Select Zones tool or choose
Select All
in the Edit menu to select all zones on the current page.
3 Click the desired zone type in the Zone Info palette.
The zone type will change accordingly.
Text (use only for single
columns and tables)
Graphic
Automatic Ignore