
8.0
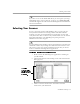
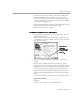
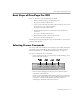
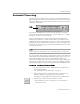
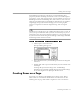
Table Of Contents
- Introduction to OmniPage Pro
- Installation and Setup
- Processing Documents
- OmniPage Pro Settings
- Customizing OCR
- Technical Information
- Glossary Terms

Creating Zones on a Page
Processing Documents - 29
An OmniPage Document is a file that is saved in OmniPage Pro’s
proprietary format. OmniPage Documents can be saved with original
page images, zones, and recognized text. You can continue to reopen an
OmniPage Document in OmniPage Pro, make edits to it, and save it in
other supported file formats. If an OmniPage Document is saved with its
original page images (the default setting), you can retain graphics,
compare recognized text with the original image, and rerecognize
pages.
OmniPage Pro can only have one working document open at a time. If
you try to open another file while you have a document open, you are
prompted to close the current document. However, you can add pages
to your current document using the
Load Image
or
Scan Image
command
in the Image button or Process menu.
To open an OmniPage Document or image file:
1 Choose
Open...
in the File menu.
The Open dialog box appears.
2 Open the folder where your OmniPage Document or image file
is located.
3 Double-click a file to open it immediately. Or, select the file and
click
Open
.
An image file opens in the Image View. An OmniPage
Document opens with its original image (if saved) in the Image
View and recognized text (if any) in the Text View.
Creating Zones on a Page
Page images are displayed in OmniPage Pro’s Image View. This is
where
zones
are created before OCR. Zones are bordered areas that
identify parts of a page that will be recognized as text or retained as