
8.0
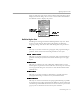
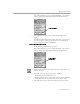
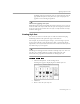
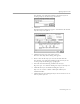
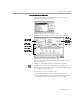
Table Of Contents
- Introduction to OmniPage Pro
- Installation and Setup
- Processing Documents
- OmniPage Pro Settings
- Customizing OCR
- Technical Information
- Glossary Terms

Applying Styles to Zones
Customizing OCR - 100
When you add a new style to a style set, its default formatting is based
on the formatting of the last-selected style. Therefore, to base a new style
on an existing style, select the existing style before creating the style.
To add new styles to the current style set:
1 Click
New
in the Edit Style Set dialog box.
The New Style Name dialog box appears.
2 Enter a name for the style you want to add and click
OK
.
For example, you could enter
Heading
as the name if you are
creating a style for heading-type paragraphs.
3 Select the desired formatting attributes for the new style.
Repeat steps 1–3 to continue adding new styles to the style set.
4 Click
OK
when you are finished editing the style set.
5 Click
Done
in the next dialog box if you do not want to edit any
other style sets.
Font Mapping
If
Auto
is selected as the font setting for a zone style, OmniPage Pro
automatically
maps
specified fonts to detected font types. To map fonts,
OmniPage Pro analyzes text and categorizes it as one of these font-types:
• Proportional Serif
Character spacing varies depending on the character; short lines
finish off the letter strokes. The body text in this manual is an
example of this font type.
• Proportional Sans-Serif
Character spacing varies depending on the character; letter
strokes do not have finishing lines. The headings in this manual
are an example of this font type.
• Monospaced Serif
Character spacing is the same for each character; short lines finish
off the letter strokes.
&RXULHU
is an example of this font type.
• Monospaced Sans-Serif
Character spacing is the same for each character; letter strokes do
not have finishing lines.
OCR-A
is an example of this font type.