
7.0


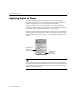
Table Of Contents
- Introduction to OmniPage Pro
- Installation and Setup
- Processing Documents
- Basic Steps of OmniPage Pro OCR
- Selecting Process Commands
- Automatic Processing
- Bringing Document Images into OmniPage Pro
- Creating Zones on a Page
- Converting Images to Text
- Scheduling OCR
- Direct Input: Pasting Text into Other Applications...
- Working With Documents
- Exporting Documents
- OmniPage Pro Settings
- Customizing OCR
- Technical Information
- Glossary

Settings Guidelines
98 - OmniPage Pro Settings
Yes Recommendations if you have an
automatic document feeder (ADF):
Select Scan Until Empty in the Scanner
section of the Settings Panel to scan a stack
of pages at once. Otherwise, you must click
the Image button to scan each subsequent
page.
Select Double-Sided Pages in the Scanner
section of the Settings Panel to scan pages
with print on both sides. You are prompted to
turn the stack over when OmniPage Pro is
ready to scan the other side.
Insert blank pages to separate more than one
job within a stack of pages. You can save
pages between blank pages as separate files
after OCR.
Other recommendations:
Create and use a zone template if all pages
have similar zoning requirements.
See Creating Zone Templates on page
110.
Set the desired process commands and click
AUTO to automatically process each page of
your document in order.
If you want to draw zones manually on
pages, scan or load all pages, draw the
desired zones, and then click AUTO to
recognize them.
Select Auto Save as the Export command
during automatic processing. After selecting
save options, you can leave the computer
unattended to finish processing.
You can select options to save the
recognized document as a single file, one file
per page, or a new file after each blank
page.
Are you processing a large document?