
7.0

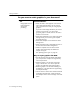
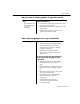


Table Of Contents
- Introduction to OmniPage Pro
- Installation and Setup
- Processing Documents
- Basic Steps of OmniPage Pro OCR
- Selecting Process Commands
- Automatic Processing
- Bringing Document Images into OmniPage Pro
- Creating Zones on a Page
- Converting Images to Text
- Scheduling OCR
- Direct Input: Pasting Text into Other Applications...
- Working With Documents
- Exporting Documents
- OmniPage Pro Settings
- Customizing OCR
- Technical Information
- Glossary

Settings Guidelines
OmniPage Pro Settings - 93
As much as possible
Keep font characteristics,
paragraph formatting, side-
by-side columns, and
graphic positioning
Recommendations:
Make sure all parts of the page are included
within zones and identified as the correct
zone type.
See Specifying Zone Types on page 32.
Select True Page as the style set for the page.
See Applying Styles to Zones on page 100.
Select the fonts you want mapped to various
font types. See Font Mapping on page 106.
Save the recognized document to a file format
that supports frame formatting.
Recommended formats are marked with a TP
in the Format pop-up menu in the Save As
dialog box. See Saving a Document on
page 60.
Please refer to your applications
documentation to get information on working
with frames.
Experiment with different export file formats to
see which one works best in your target
application.
Formatting is not retained if you save to a file
format, such as ASCII Text, that does not
support it.
How much formatting do you want to keep?