
7.0
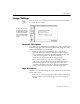
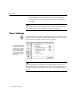
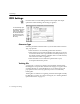
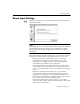
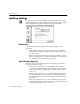
Table Of Contents
- Introduction to OmniPage Pro
- Installation and Setup
- Processing Documents
- Basic Steps of OmniPage Pro OCR
- Selecting Process Commands
- Automatic Processing
- Bringing Document Images into OmniPage Pro
- Creating Zones on a Page
- Converting Images to Text
- Scheduling OCR
- Direct Input: Pasting Text into Other Applications...
- Working With Documents
- Exporting Documents
- OmniPage Pro Settings
- Customizing OCR
- Technical Information
- Glossary

Scanner Settings
OmniPage Pro Settings - 71
Page Size Options
Select the dimensions of the pages you plan to scan in the
Size
pop-up
menu.
Select
Letter
for 8.5 by 11 inch pages.
Select
A4
for 21 by 29.7 cm pages.
Select
Legal
for 8.5 by 14 inch pages.
Orientation Options
Select the orientation of the pages you plan to scan in the
Orientation
pop-up menu. Be sure to also load pages correctly in your scanner.
Select
Portrait
for a vertically-oriented page.
Select
Landscape
for a horizontally-oriented page.
Select
Flipped
to automatically rotate a portrait page image 180
degrees.
Select
Flipscape
to automatically rotate a landscape page image
180 degrees.
Flipped
and
Flipscape
options are useful if you are scanning pages in a
book and have trouble positioning the book correctly in the scanner.
ADF Options
If you use a scanner with an
automatic document feeder
(ADF), you can use
the following options.
Select
Scan until Empty
to scan every page in your scanners ADF.
This setting is useful when you want to scan a stack of pages at
once. If
Scan until Empty
is not selected, OmniPage Pro only scans
the first page in your ADF and you must click the Image
button
to scan each subsequent page.
Select
Double-sided Pages
to scan pages that have text printed on
both sides.
OmniPage Pro scans pages and then prompts you to turn them
over so it can scan the reverse sides. If you have a stack of
double-sided pages, be sure to also select
Scan until Empty
. After
scanning, page images are displayed in Image View in the correct
order.