
7.0
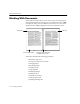


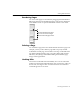
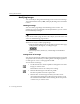
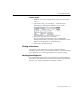

Table Of Contents
- Introduction to OmniPage Pro
- Installation and Setup
- Processing Documents
- Basic Steps of OmniPage Pro OCR
- Selecting Process Commands
- Automatic Processing
- Bringing Document Images into OmniPage Pro
- Creating Zones on a Page
- Converting Images to Text
- Scheduling OCR
- Direct Input: Pasting Text into Other Applications...
- Working With Documents
- Exporting Documents
- OmniPage Pro Settings
- Customizing OCR
- Technical Information
- Glossary

Exporting Documents
60 - Processing Documents
Exporting Documents
You can export original images or recognized text for use in other
applications by:
Saving a Document
Copying a Document to the Clipboard
Using Drag and Drop Functionality
Sending Mail
Saving a Document
You can save recognized text, retained graphics, and original images to
disk in a variety of file formats.
Save your document as an OmniPage Document file or as an image file
if you want to reopen it in OmniPage Pro again. OmniPage Documents
can retain all original images, zones, and recognized text. Image file
formats retain only the original image.
To save a document:
1Choose
Save As...
in the File menu.
You can also click the Export button with
Save As...
selected in
the pop-up menu.
The Save As dialog box appears.
2 Select the folder where you want your file saved.
3 Type in a file name for your document.
Type in the desired
name for your file.
Select save options when
saving to formats other
than OmniPage Document .