
7.0

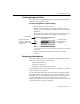
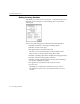
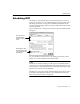
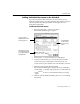
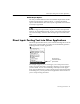
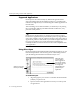
Table Of Contents
- Introduction to OmniPage Pro
- Installation and Setup
- Processing Documents
- Basic Steps of OmniPage Pro OCR
- Selecting Process Commands
- Automatic Processing
- Bringing Document Images into OmniPage Pro
- Creating Zones on a Page
- Converting Images to Text
- Scheduling OCR
- Direct Input: Pasting Text into Other Applications...
- Working With Documents
- Exporting Documents
- OmniPage Pro Settings
- Customizing OCR
- Technical Information
- Glossary

Converting Images to Text
Processing Documents - 41
Checking OCR Results
Recognized text appears in the Text View after OCR so you can check for
errors and misspellings in the text before exporting it to another
application.
Error checking starts automatically after OCR if you chose
OCR & Check
as the OCR command.
You can select dictionaries and other error checking options in the
Spelling
section of the Settings Panel. See Spelling Settings on page 80
for more information.
To check and correct errors in recognized text:
1 Click the Check Recognition shortcut button in the AutoOCR
toolbar or choose
Check Recognition...
in the Edit menu.
OmniPage Pro will stop at the following:
Words with suspect or questionable characters (marked in
green)
Language Analyst corrections (marked in blue)
Unrecognizable characters marked by a red reject character (~
is the default)
Words not found in the main or user dictionary
When OmniPage Pro stops on a word, it highlights the word in
the Text View. The Check Recognition dialog box shows the
original image of the word in the context of the original page.
Click in this window to
enlarge the view of the
original image. Option-
click to reduce the view.
Select Check Markers
Only to check only for
recognition errors.
Click
Options to
select error-
checking
options.